One-box environments for Dynamics 365 for Finance and Operations are a great convenience for us developers as we do not have to go through the pain of installing the system from scratch or worry about installing updates, but in order to use the VM correctly we do need to make some changes. This guide is based on official recommendations from Microsoft and my own experience with one-box VMs.
One-box refers to the fact that everything is installed in a single box, SQL Server, the AOS, IIS, Visual Studio and everything else you need to run Dynamics 365 for Finance and Operations. The one-box environment is for development purposes only and cannot be used for production.
Hardware and Software requirements:
- A 4th generation Intel i7 (4 cores) or equivalent processor with Second Level Address Translation (SLAT), Virtualization Technology and Hardware Enforced Data Execution Prevention. CPU support for VM Monitor Mode Extension (VTc on Intel CPUs).
- 64 bit Windows.
- At least 32GB of RAM.
- A Sata III 6GB/sec internal SSD drive with at least 250GB free space.
- An MSDN, Action Pack subscription or a Visual Studio 2015 professional license.
Download a VM From Dynamics Lifecycle Services (LCS)
Updates to one-box environments are now being posted in the Shared Asset Library in LCS.
1. Log in to Microsoft Dynamics Lifecycle Services using your credentials.
2. Click on the Shared Asset Library tile.

3. Click on downloadable VHD on your left.

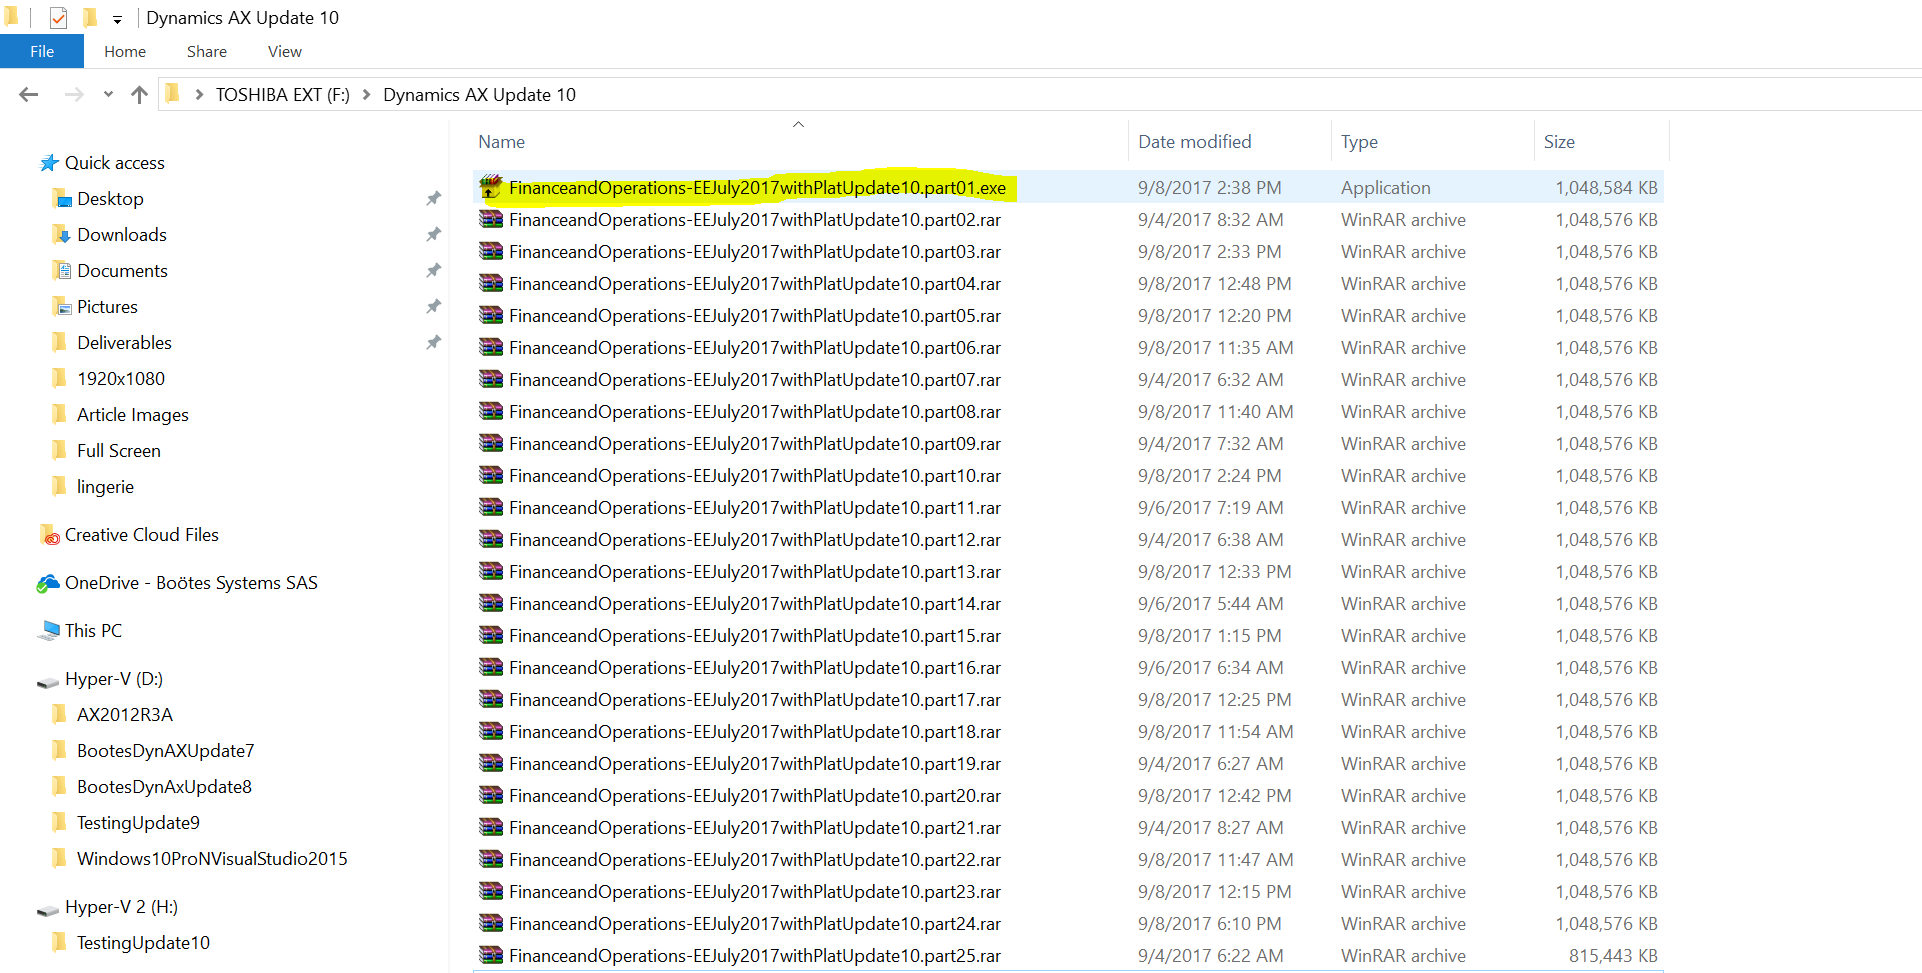
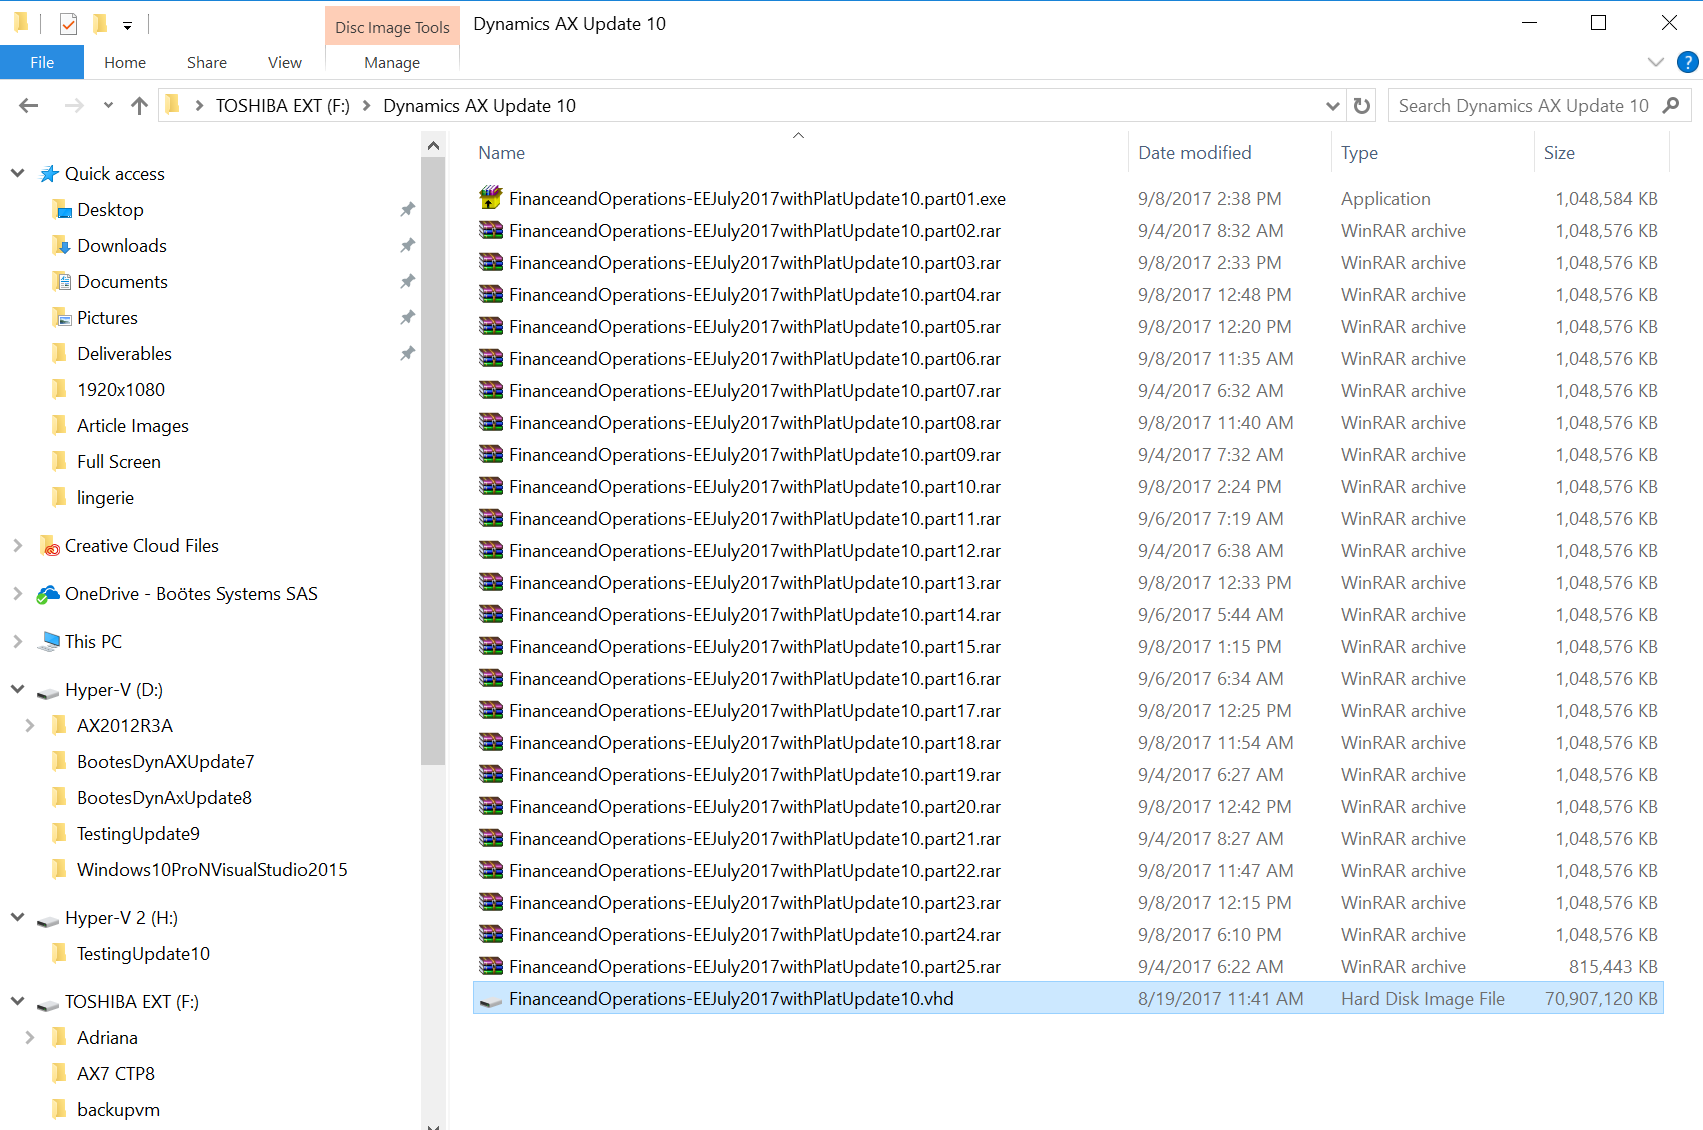
4. Download the rar files, each VHD will have several files, be sure to check the release as well as the update number:

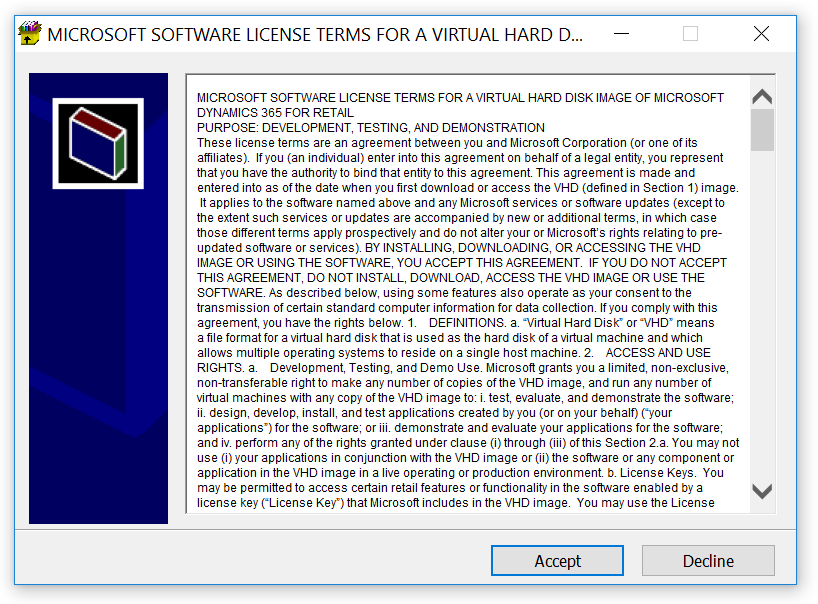
5. Once you have downloaded all files to a directory on your hard drive execute the part01.exe file to begin extracting.
6. The extraction process will take anywhere between 15 minutes to 25 minutes depending on your hardware.
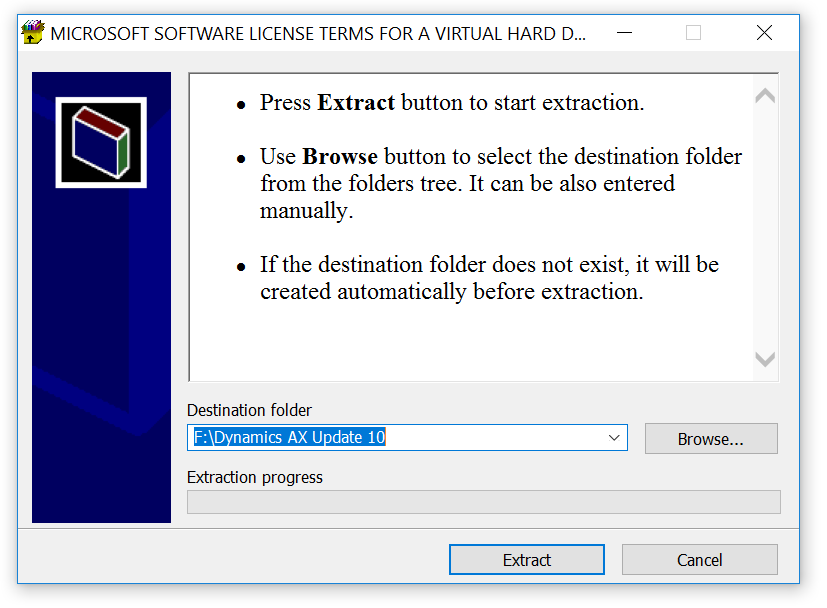
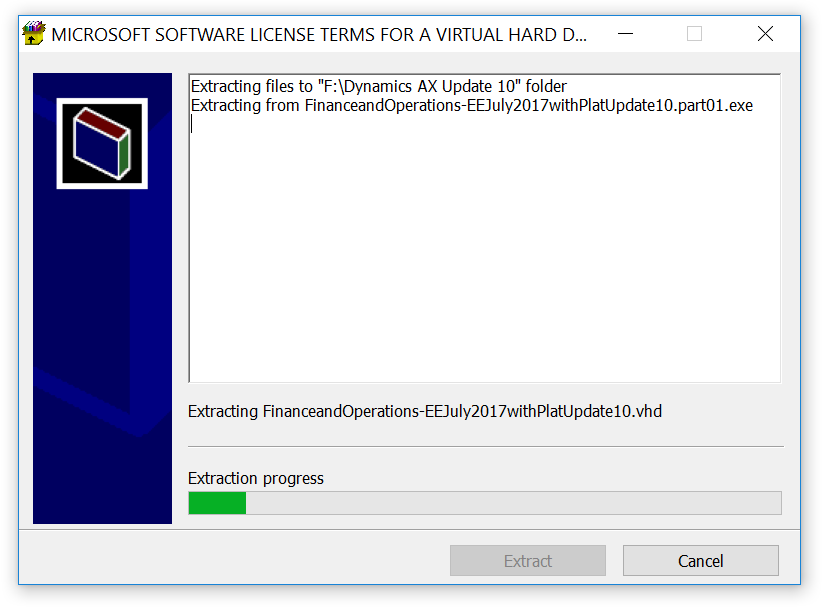
7. Once you're done extracting you will end up with a .vhd file. Copy this .vhd file to your SSD drive.
Setup up the Virtual Machine in Hyper-V
Hyper-V is used to create virtual machines on Windows 64 bit. It is available in Windows Server (2008 onwards) and Windows Pro and Enterprise editions (since Windows Vista). There are BIOS as well as Windows requirements to get Hyper-V up and running. These are beyond the scope of this article so we will assume that Hyper-V is correctly set up in your machine.
If you do not have Hyper-V set up you can refer to these articles:
Install Hyper-V and create a virtual machine
Be sure to have a virtual switch created because the Dynamics 365 for Finance and Operations Virtual Machine will not run without internet access (it needs to validate users).
If you do not have a virtual switch installed follow these instructions:
Create a virtual switch for Hyper-V virtual machines
Once your virtual switch is installed you can create your VM.
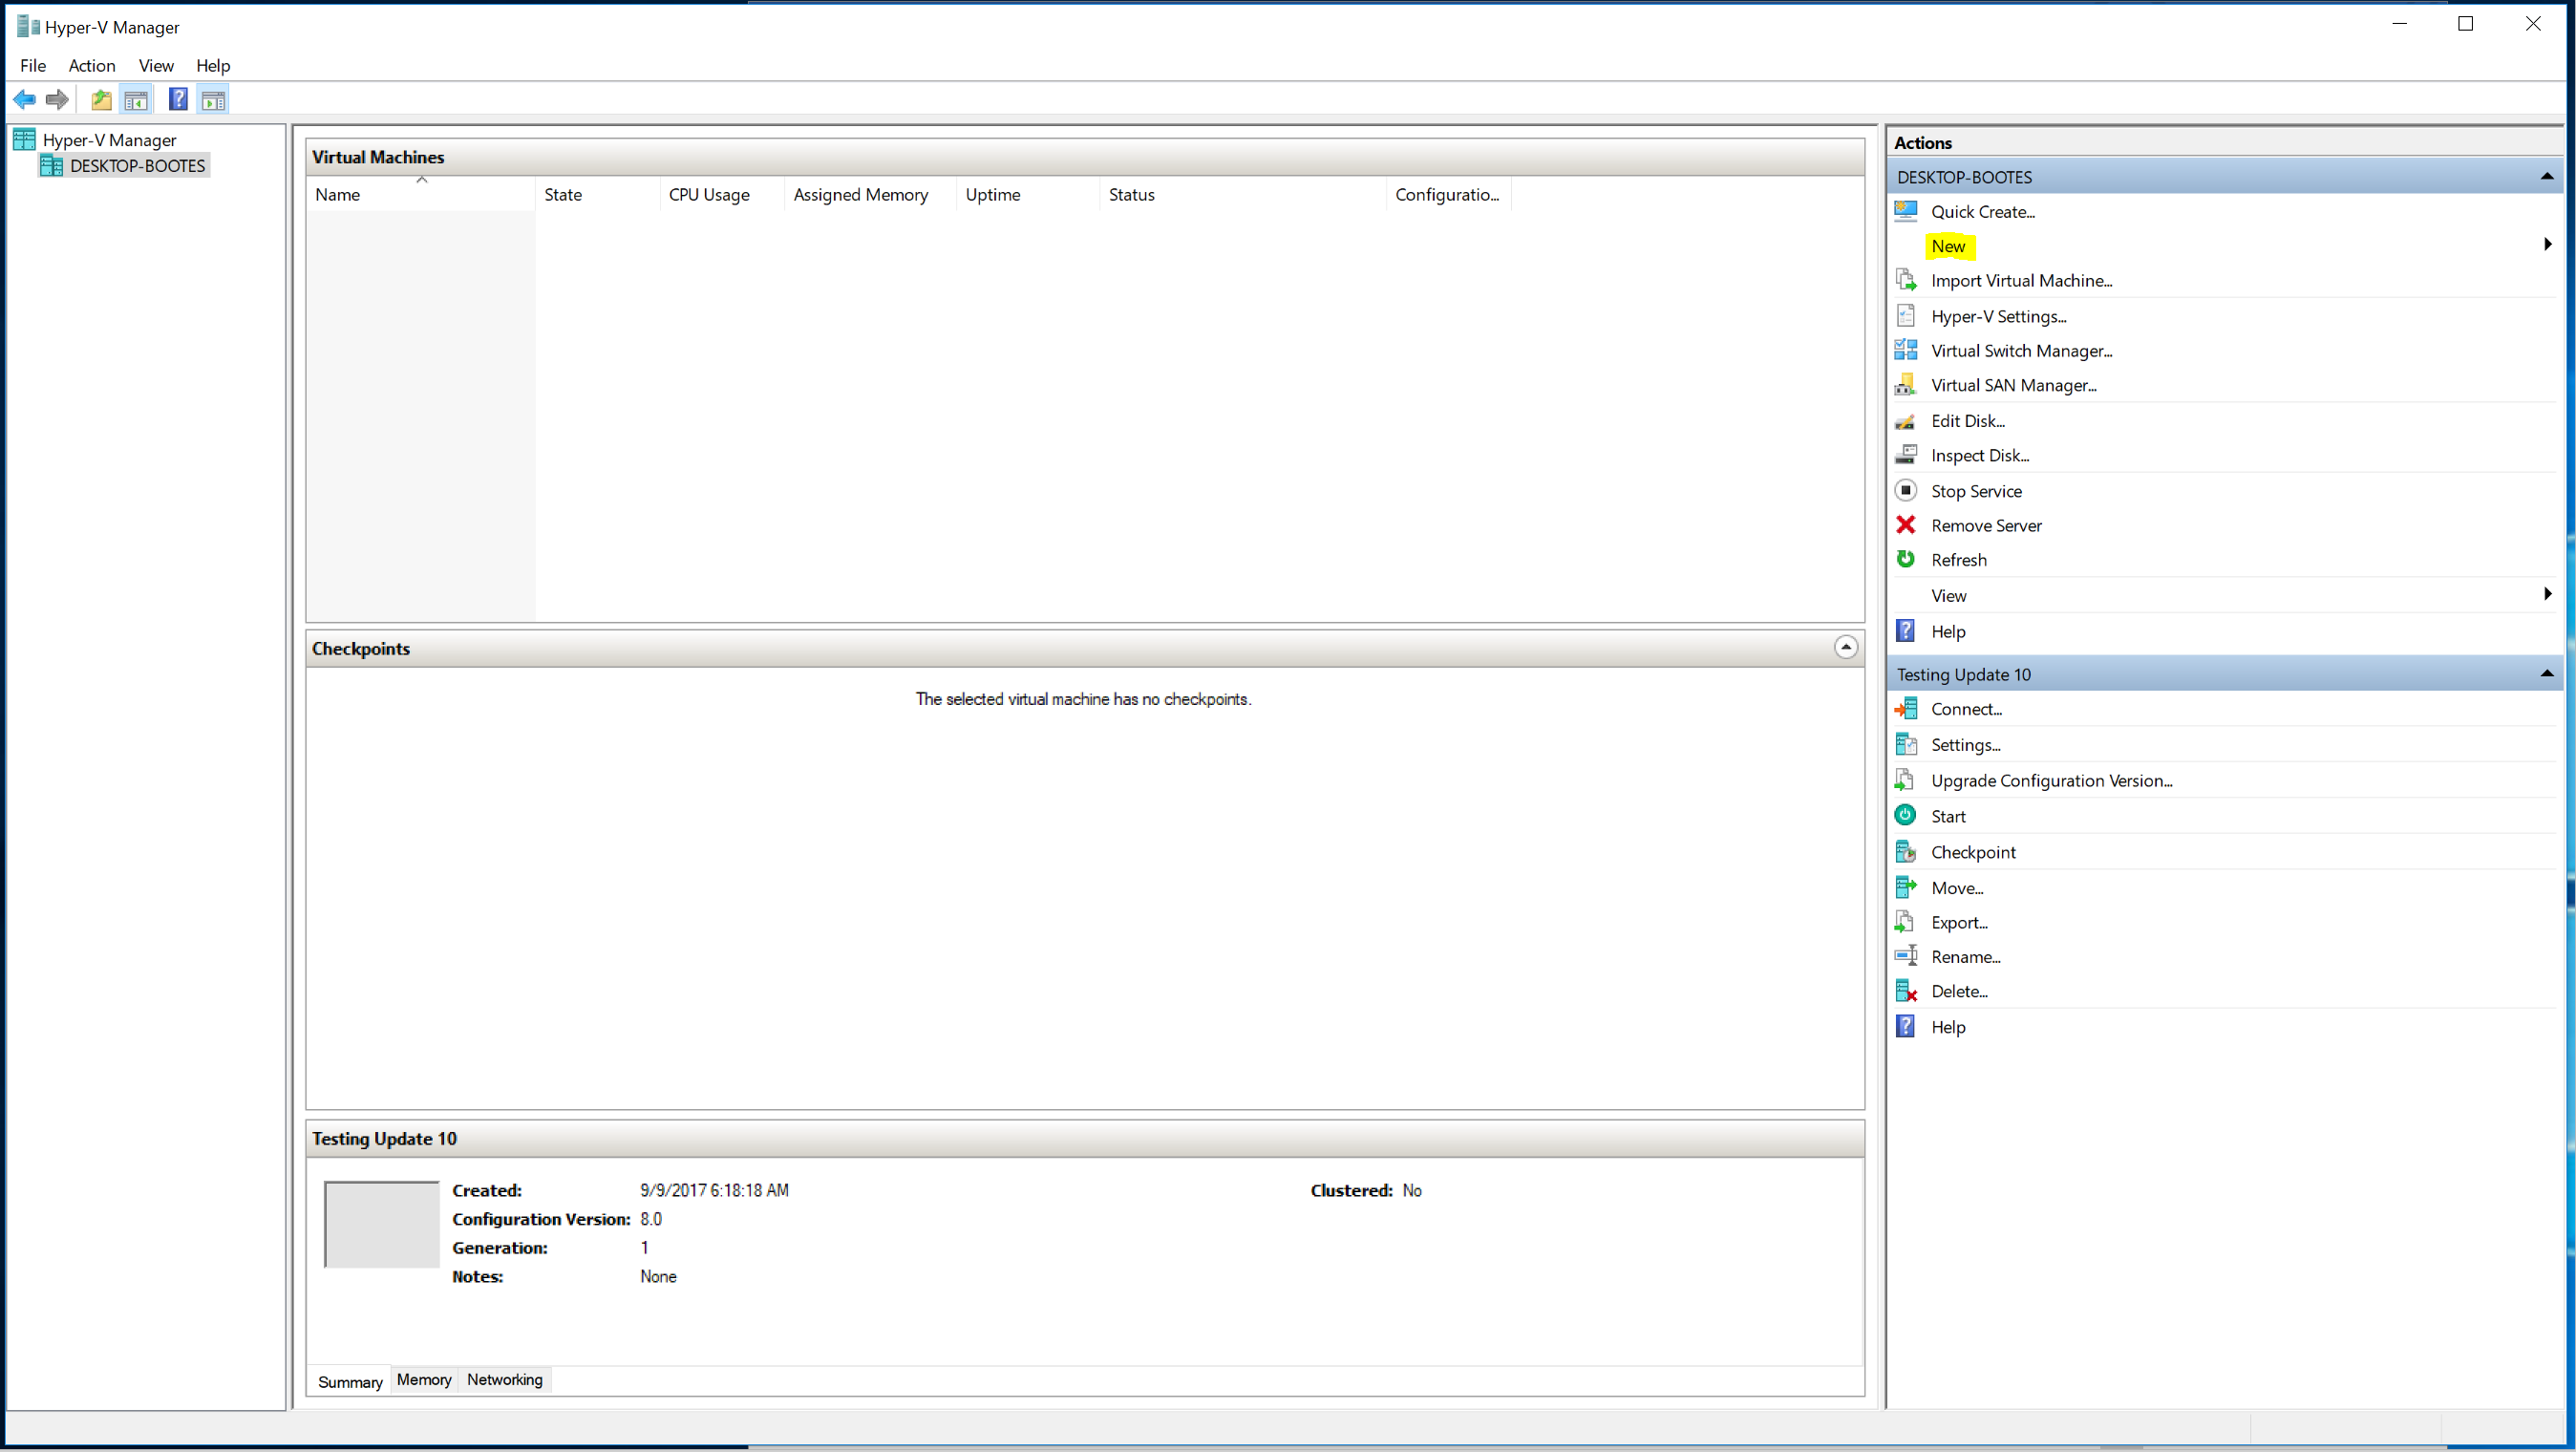
1. Open the Hyper-V manager, click on the "new" button:
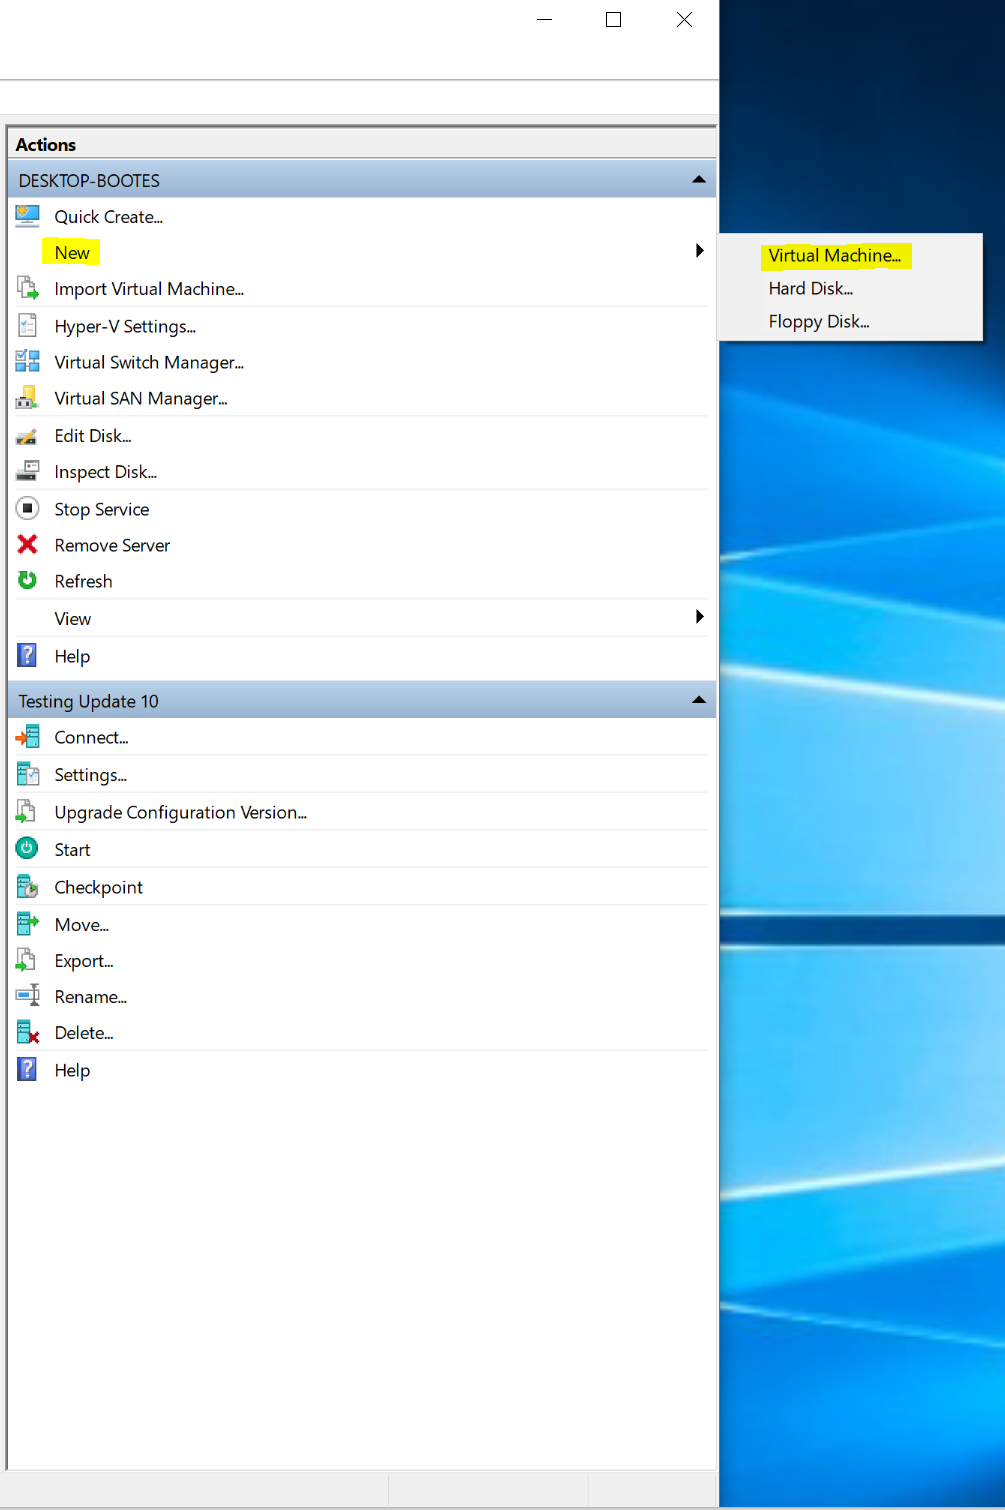
2. Click on the "Virtual Machine" menu item.
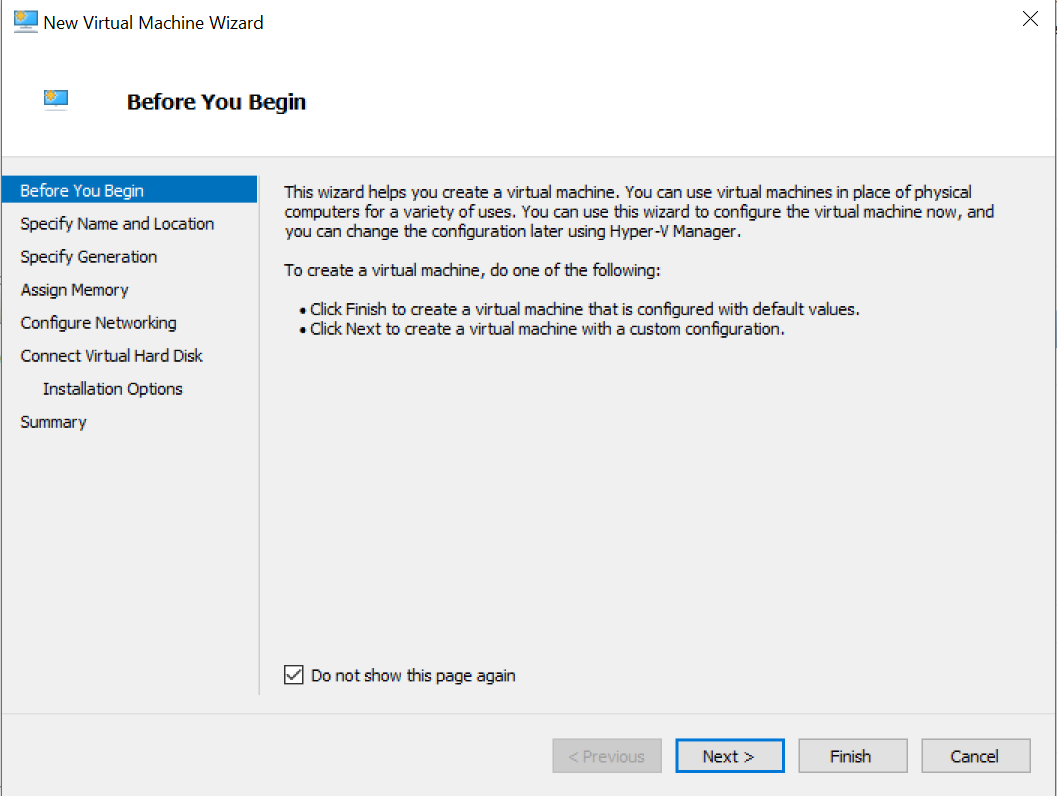
3. Skip the first dialog and set the checkbox to never show again.
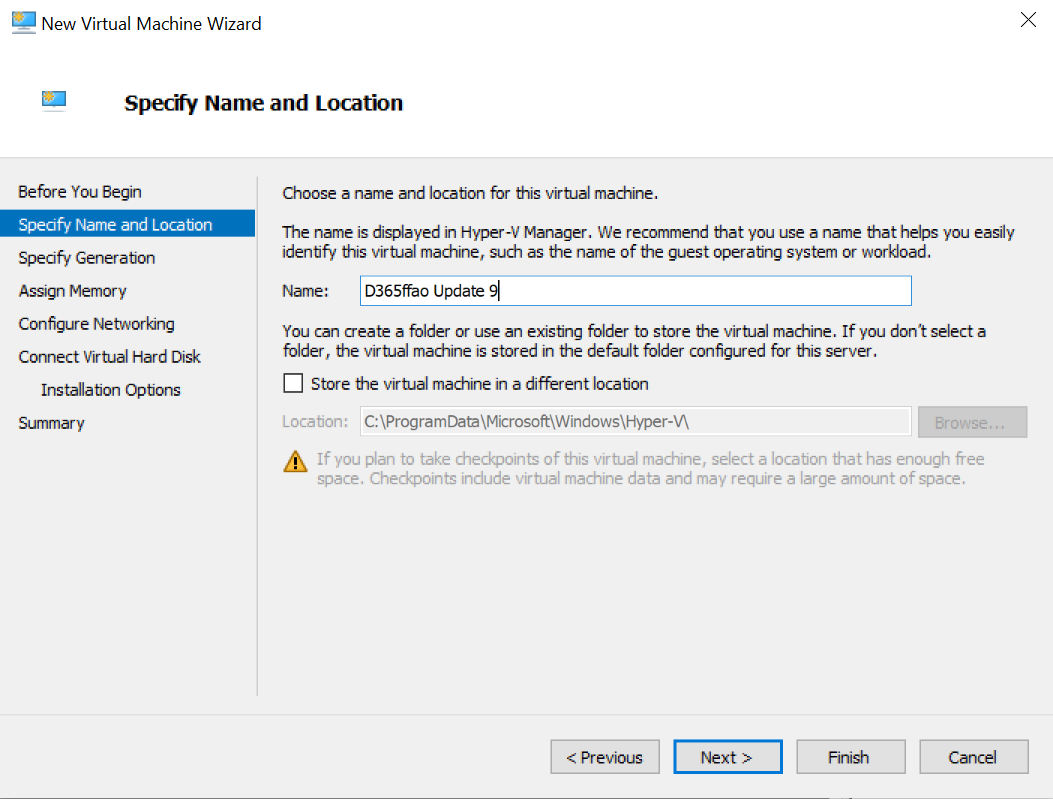
4. Give the new virtual machine a descriptive name:
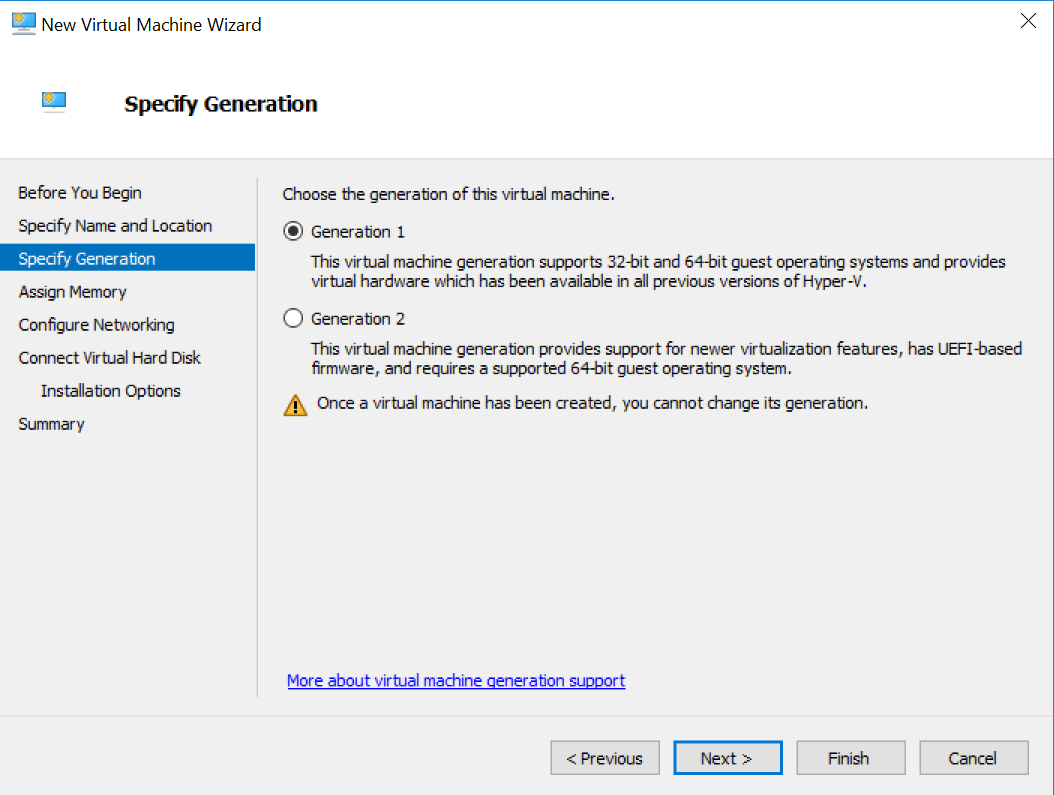
5. Choose a "Generation 1" for the virtual machine.
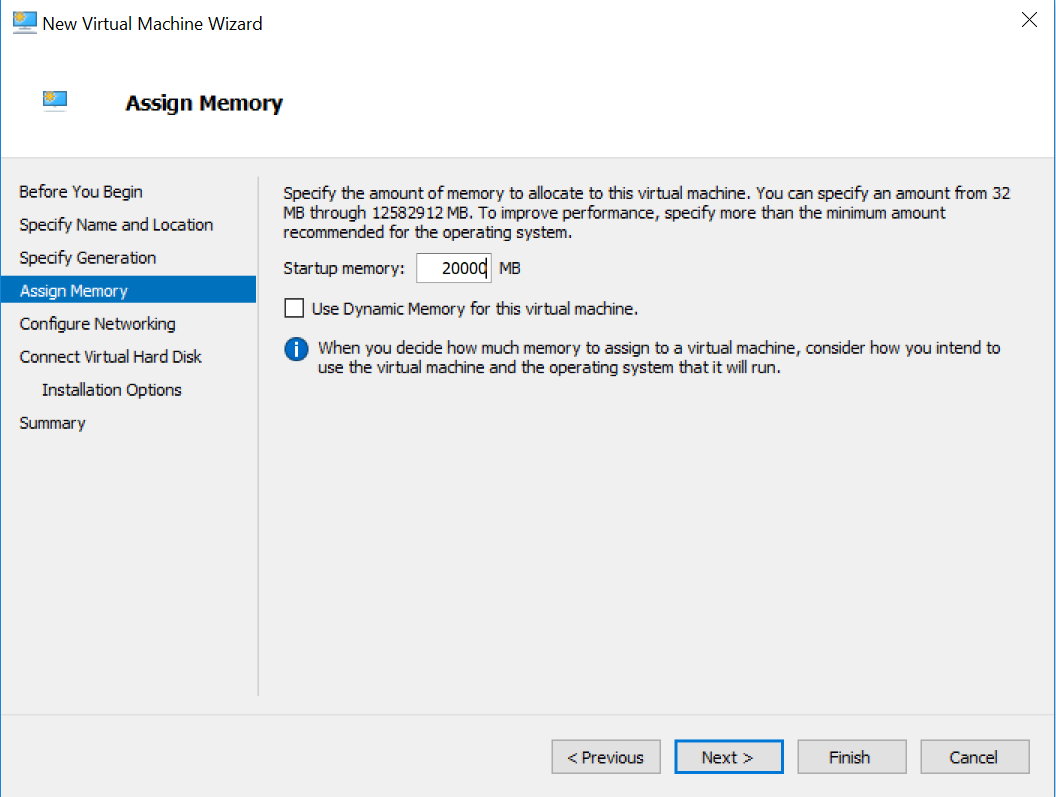
6. Select at least 20000MB of memory for the VM. Uncheck the "Use dynamic memory for this virtual machine". Using dynamic memory is not recommended because it will degrade performance.
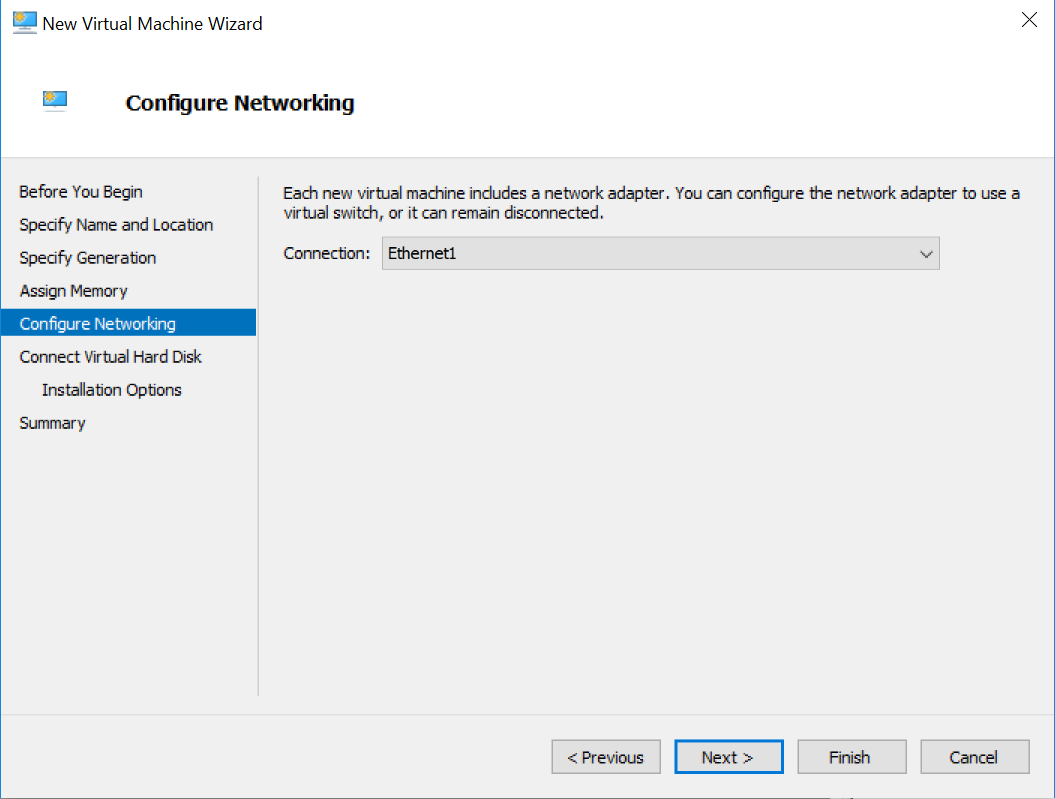
7. Select the virtual switch that you created, a switch with an internet connection:
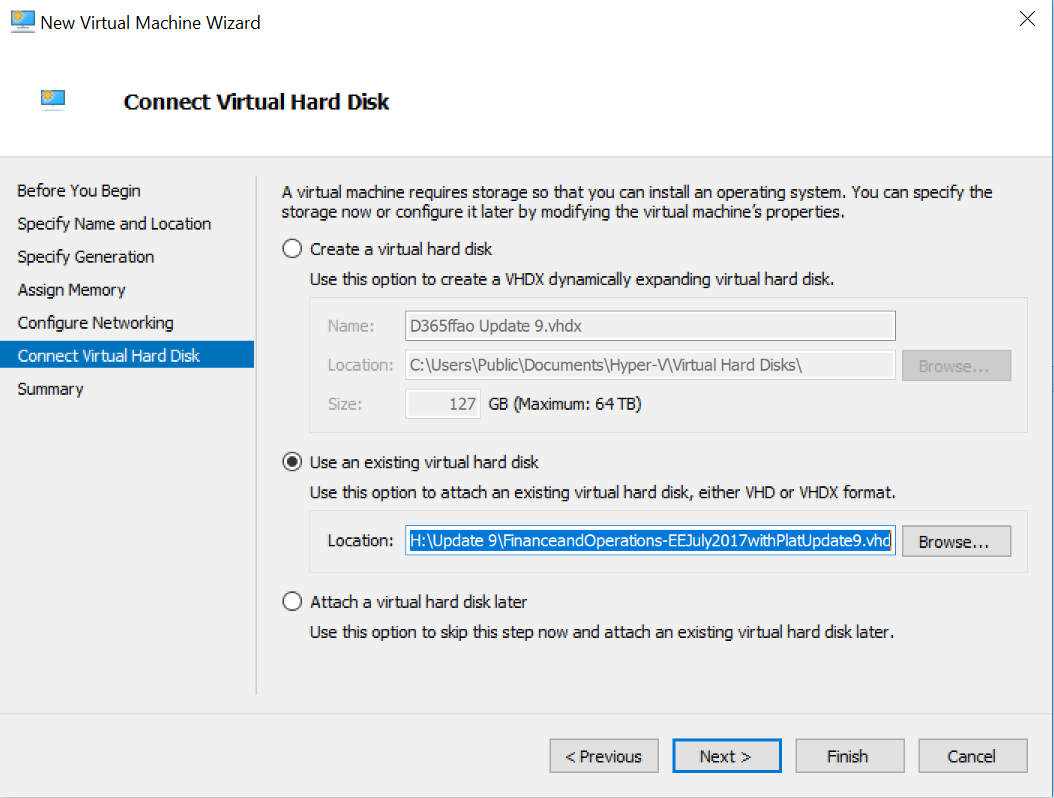
8. Select the vhd file you've downloaded and unpacked from Microsoft Connect and copied to your SSD drive.
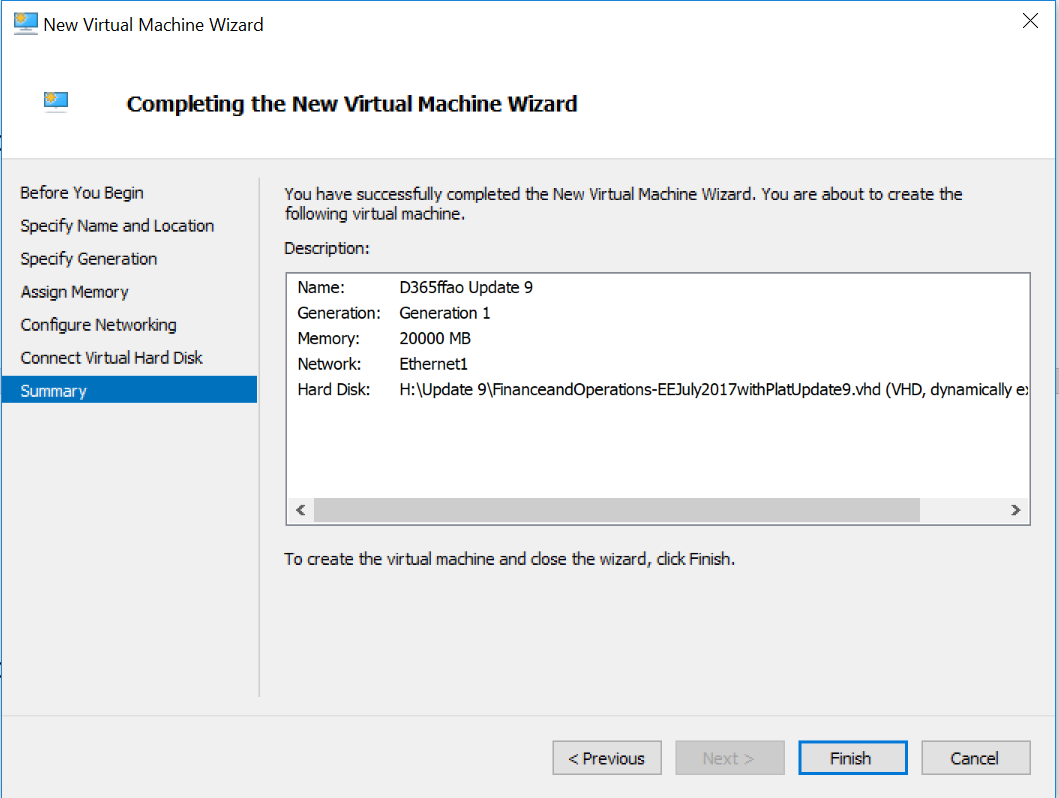
9. Finally click on the Finish button to exit the wizard.
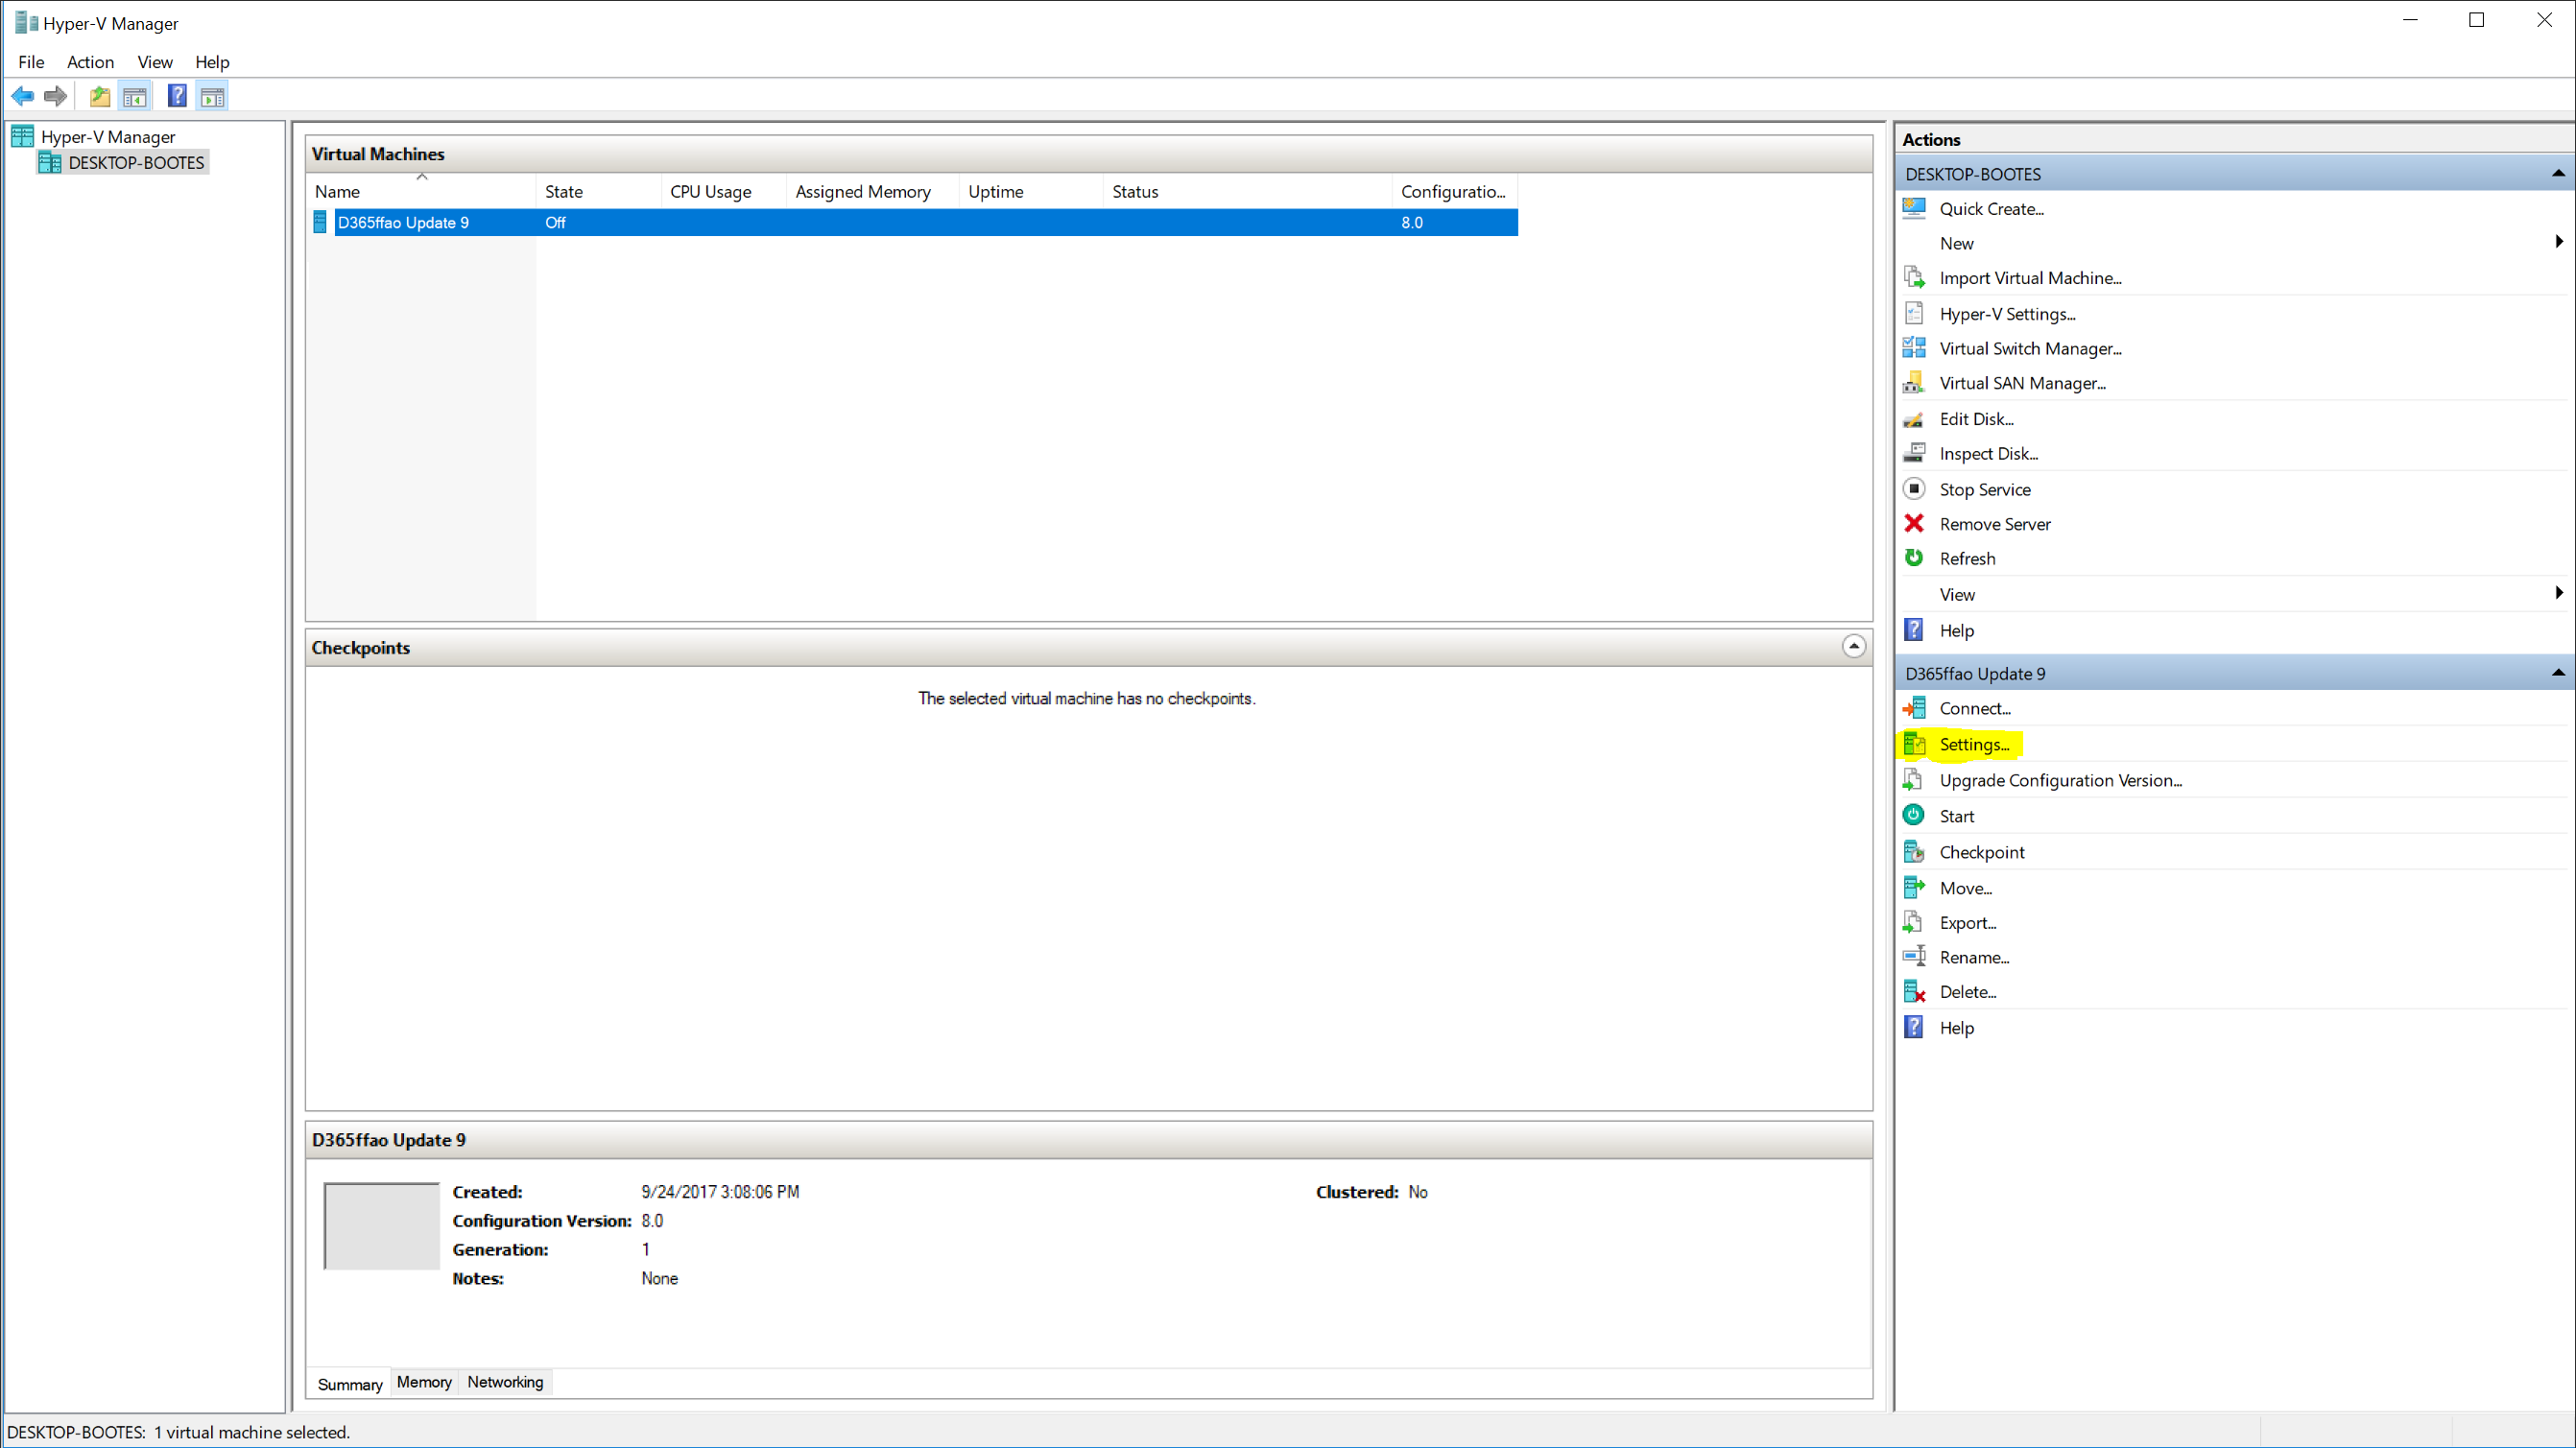
10. Select the newly created VM and click on settings on the right.
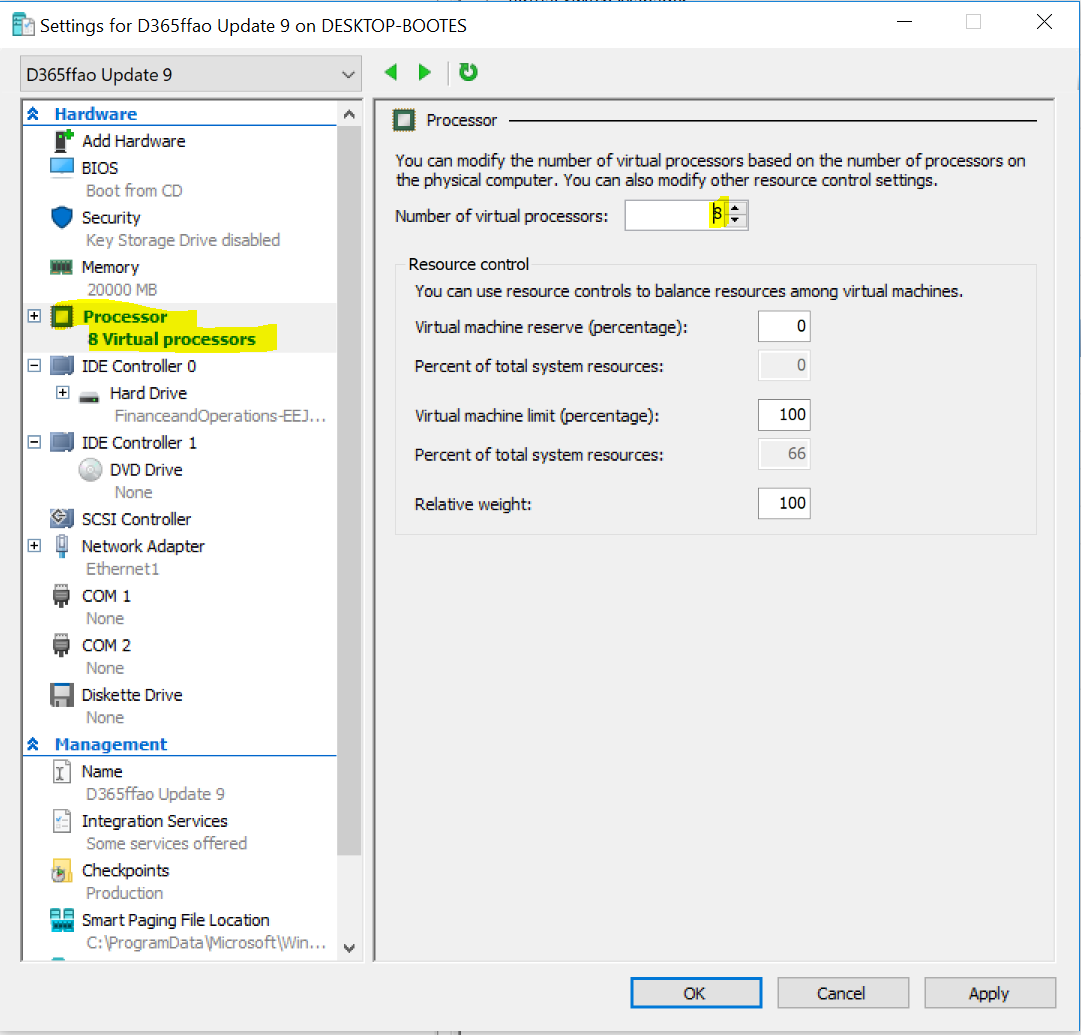
11. Click on Processor on the left and select 8 or more virtual processors (depends on your hardware but generally 8 is a good number). VMs running on a single virtual processor will have severely degraded performance.
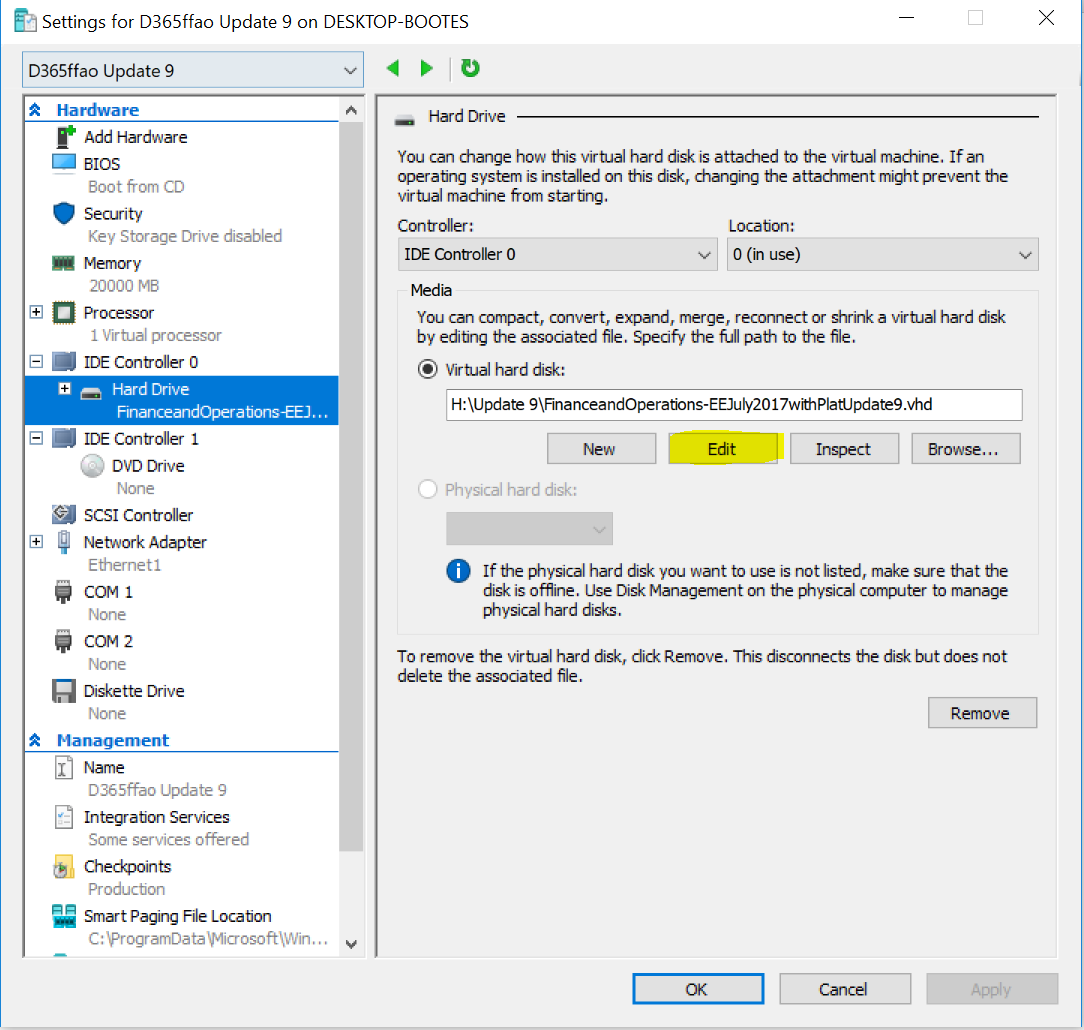
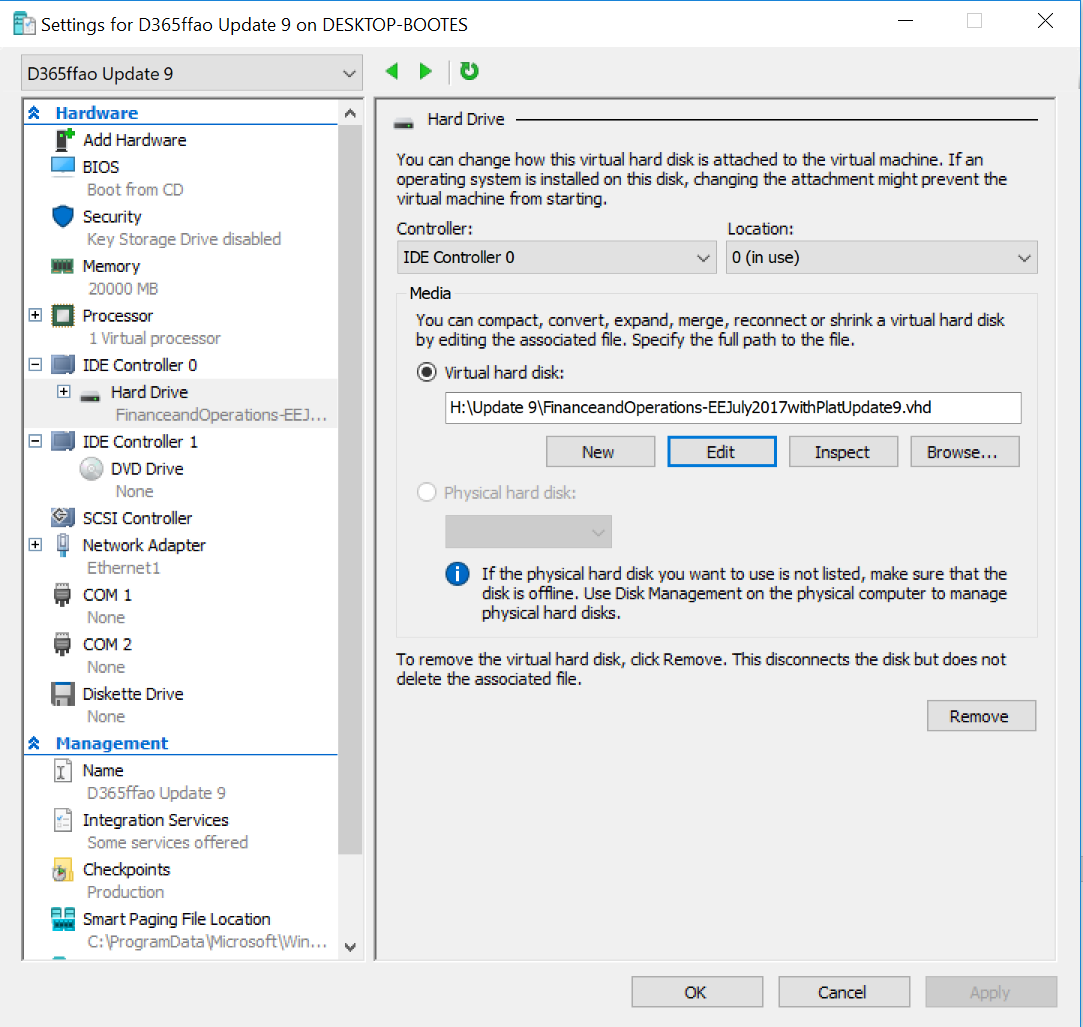
12. It is also good practice to expand your VMs disk size. VMs generally come with a disk size of 128GB and this should be increased to 200GB. You might run out of disk space while coding and experience crashes if you don't do this. This is the first part of a two-step process. Click on "hard drive" under IDE controller on your left and then click on the "Edit" button.
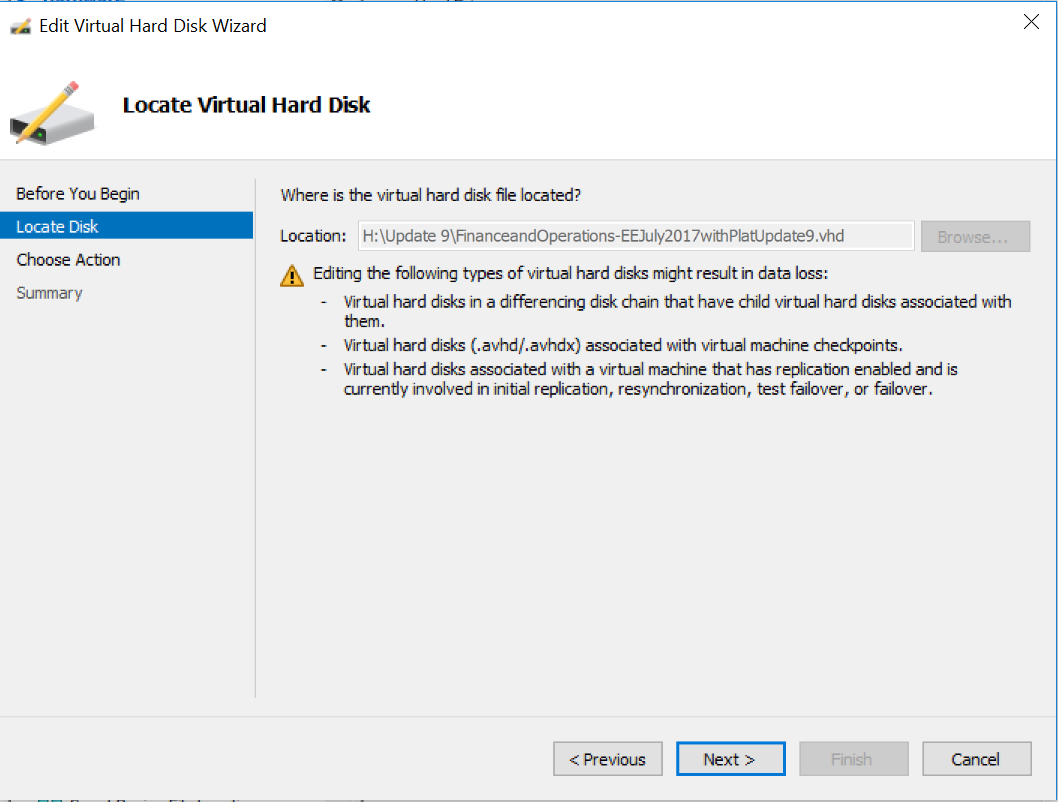
13. Click on the "Next" button.
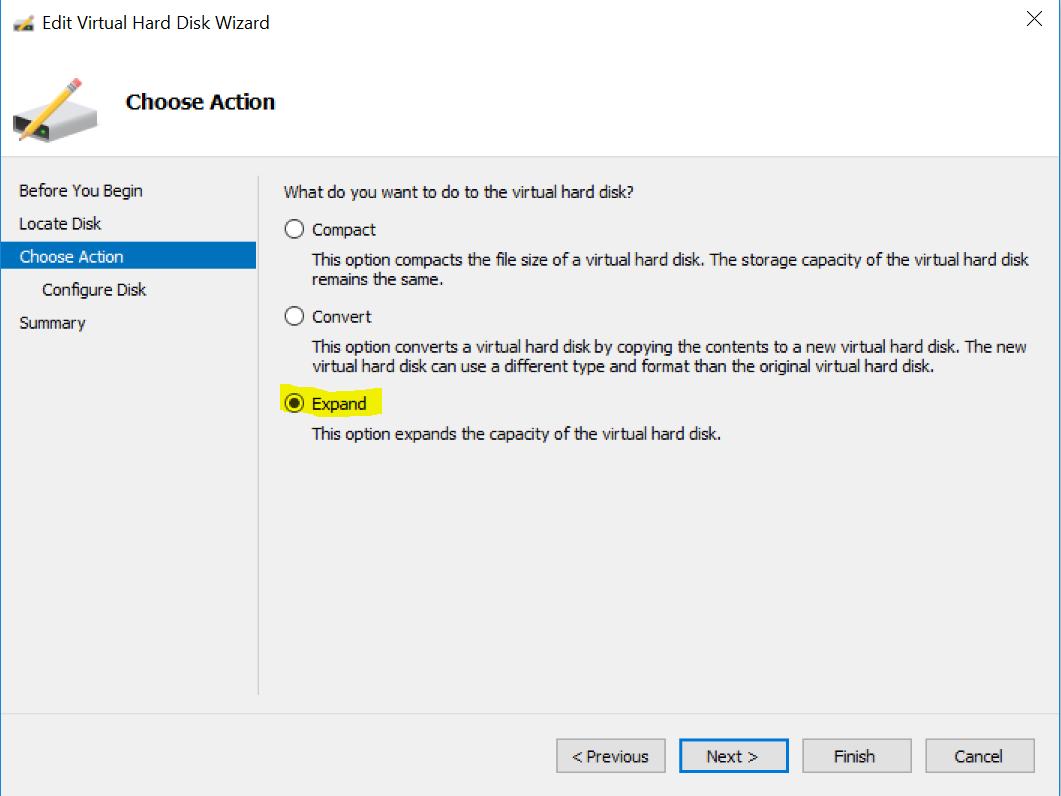
14. Select the "Expand" option.
15. Type 200GB as the new size and then click on the "Finish" button.
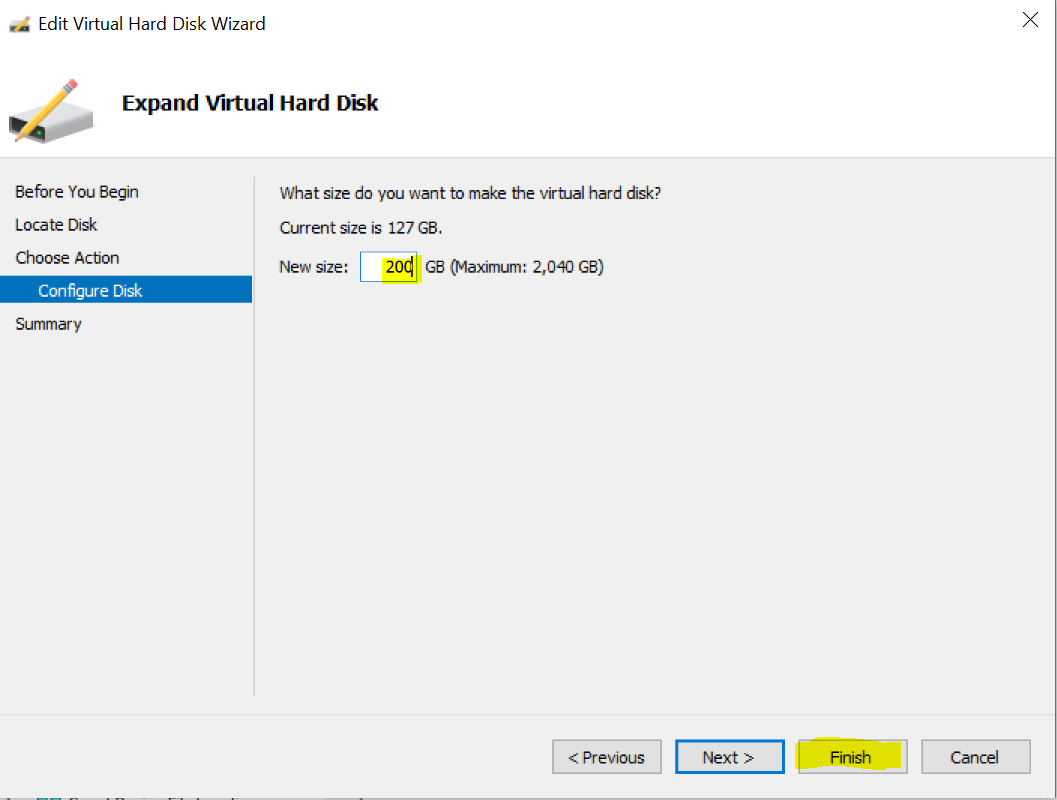
16. Click on the OK button to exit the settings button.
Turn on your VM for the First Time
When we turn on the VM for the first time we must complete a series of steps: check if the VM has an internet connection, expand the hard drive to 200GB, configure the new administrator account for Dynamics 365 for Finance and Operations, open an instance of D365 in Internet Explorer and rename the computer.
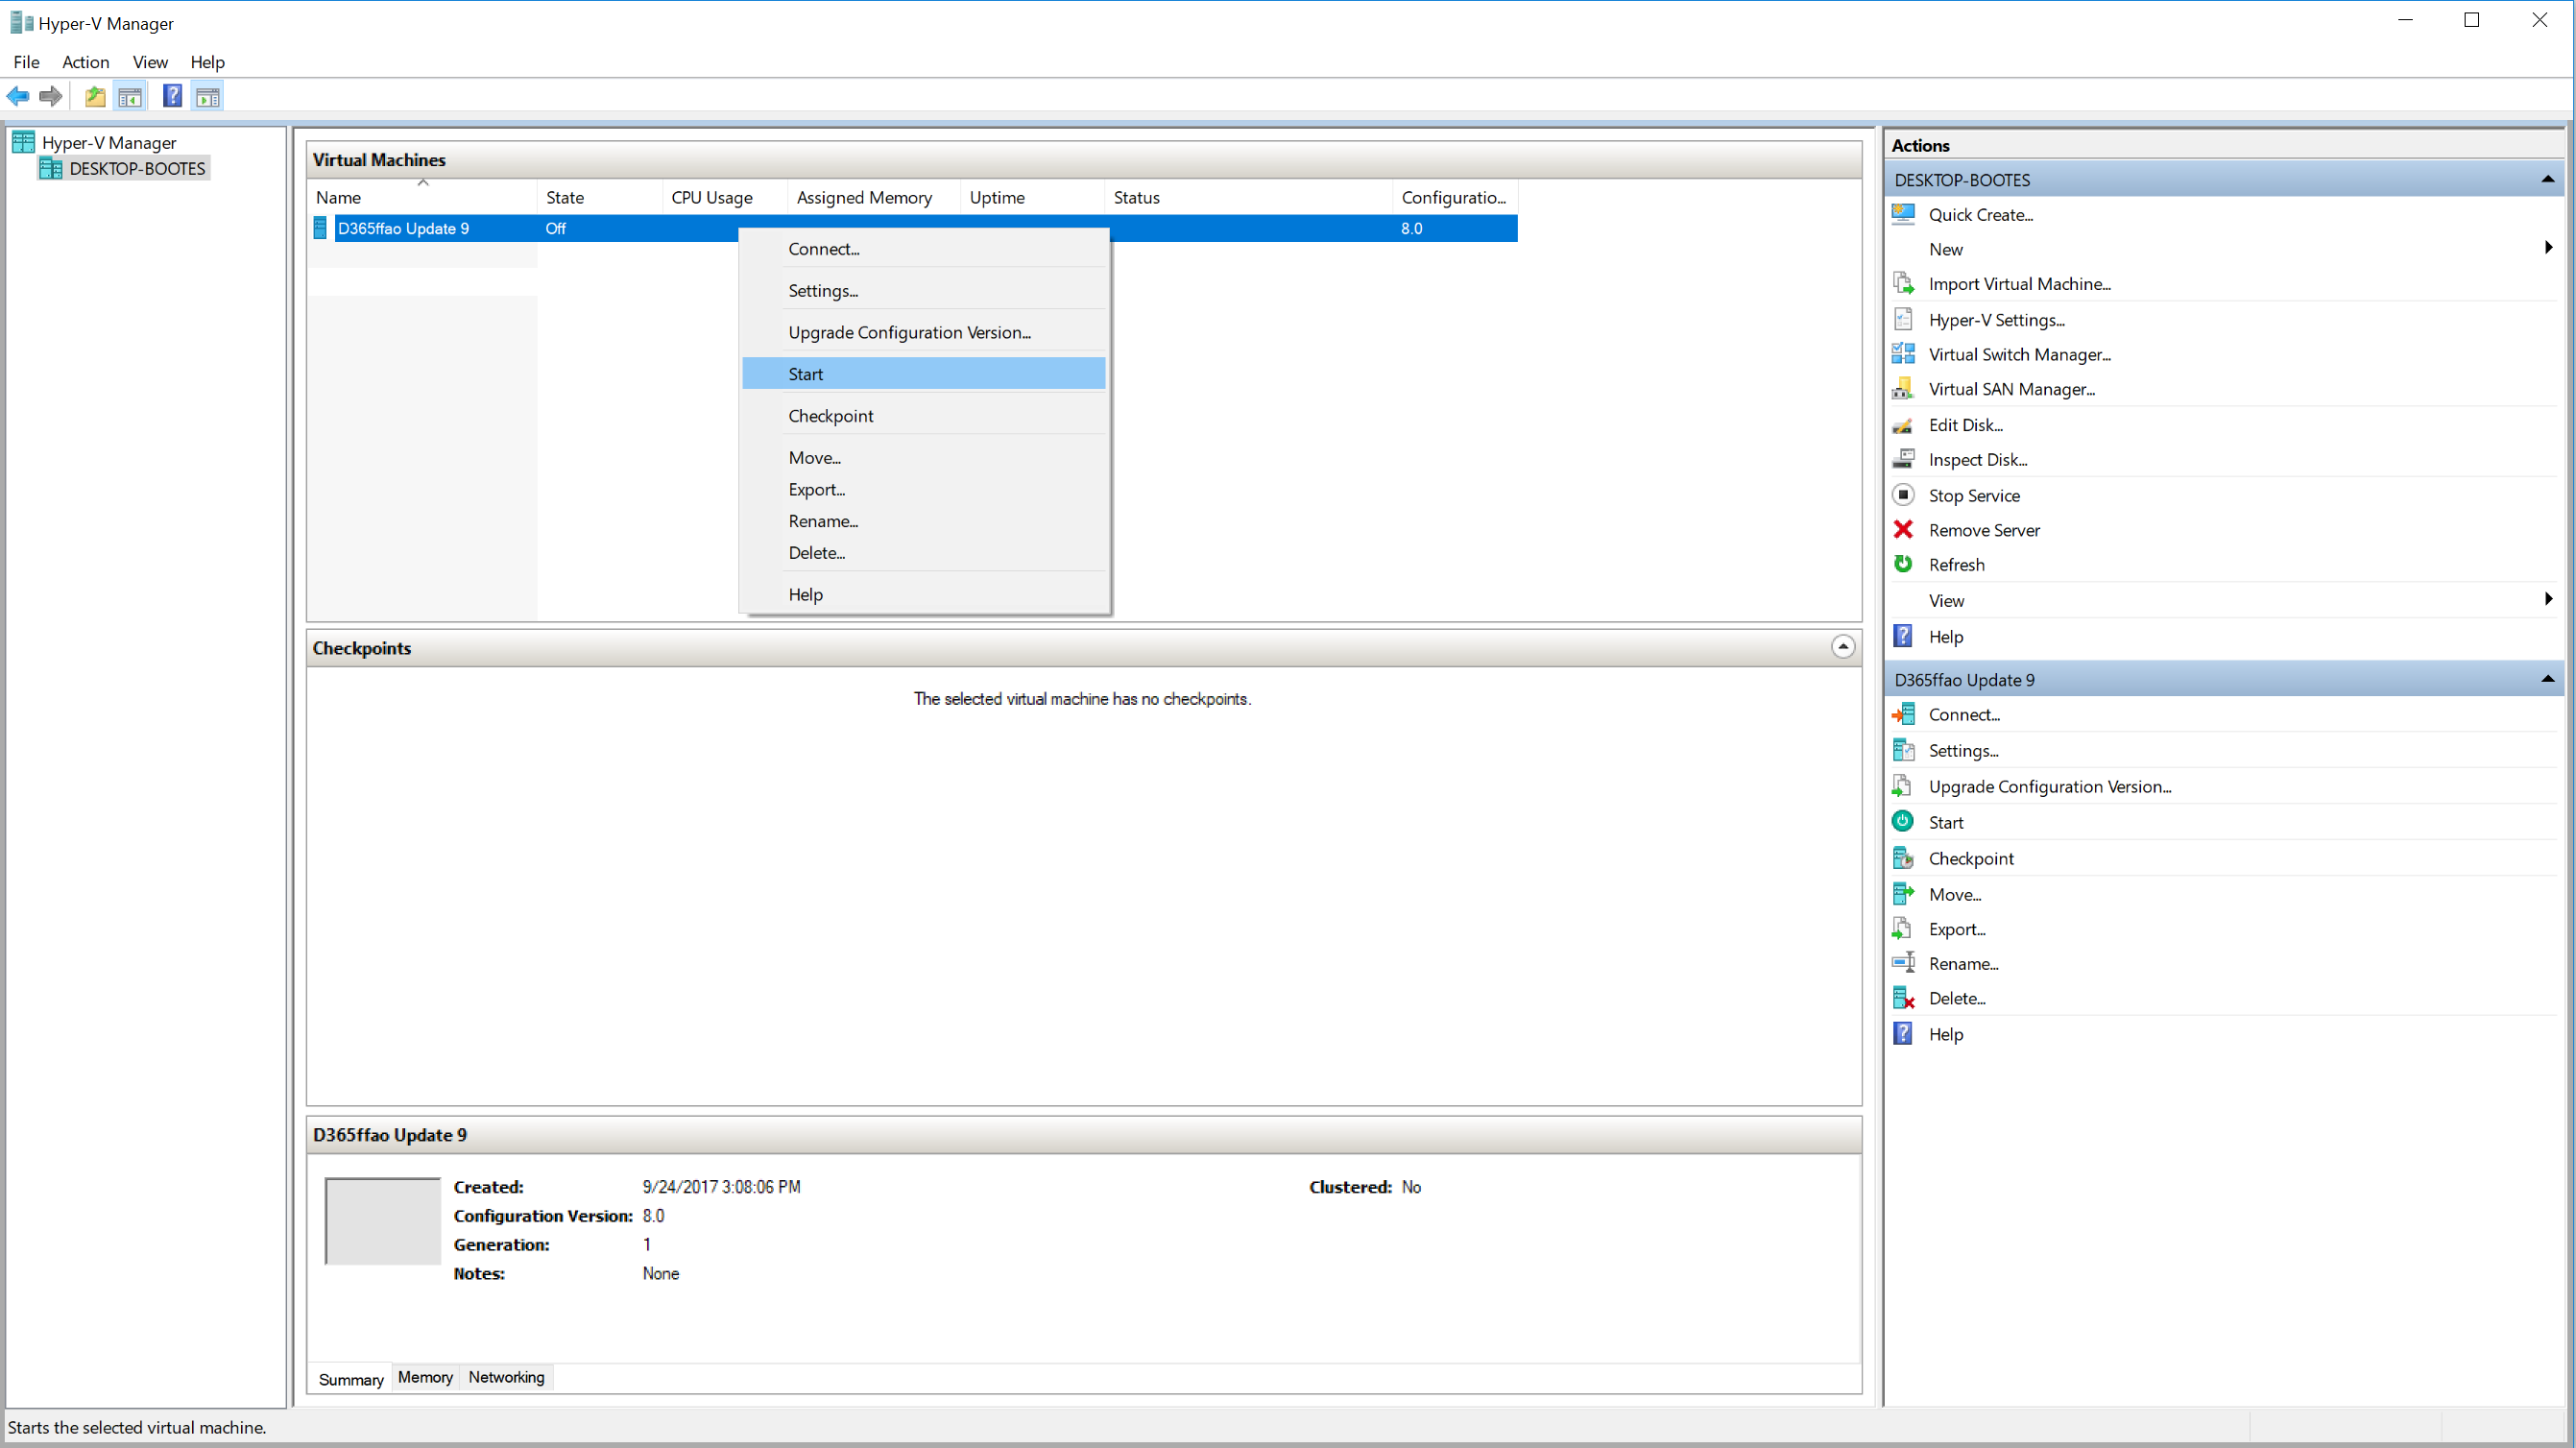
1. Right click on your VM and select "Start".
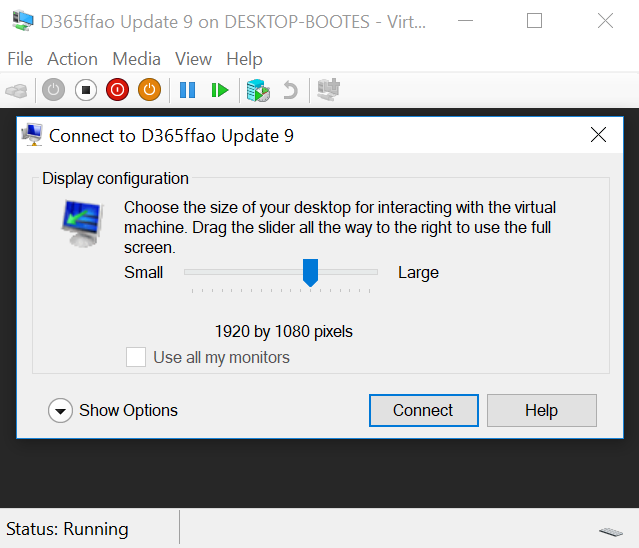
2. Wait until the VM is in the Windows login screen. Double click on the windows login screen.
3. Select your desired screen size, I would recommend a minimum of 1920x1080 screen resolution.
4. Log on to the VM, the password for administrator is pass@word1.
5. Verify that you have an internet connection in the VM, the icon in the lower right corner should be in a normal state as shown here:
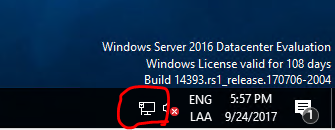
6. If you have a warning or a forbidden sign on the connection icon and your computer hosting the VM can connect to the internet, it means that you've probably have an incorrect virtual switch configuration.

Expand the Hard Drive
The expansion of the hard drive is a two-step process, the previous you've completed when you entered the settings dialog in the Hyper-V Manager.
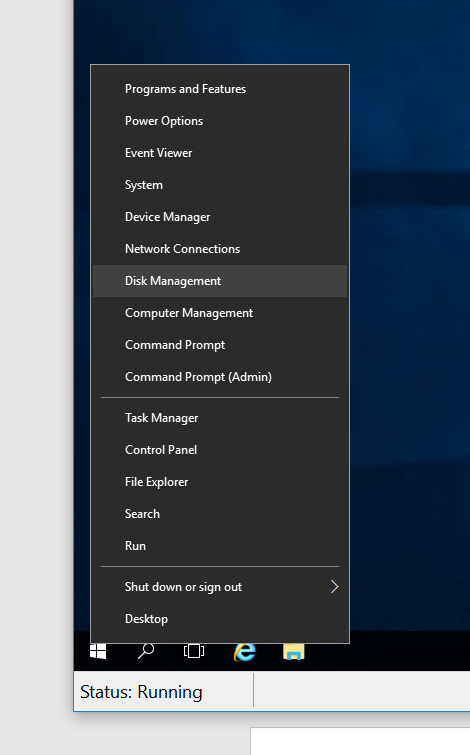
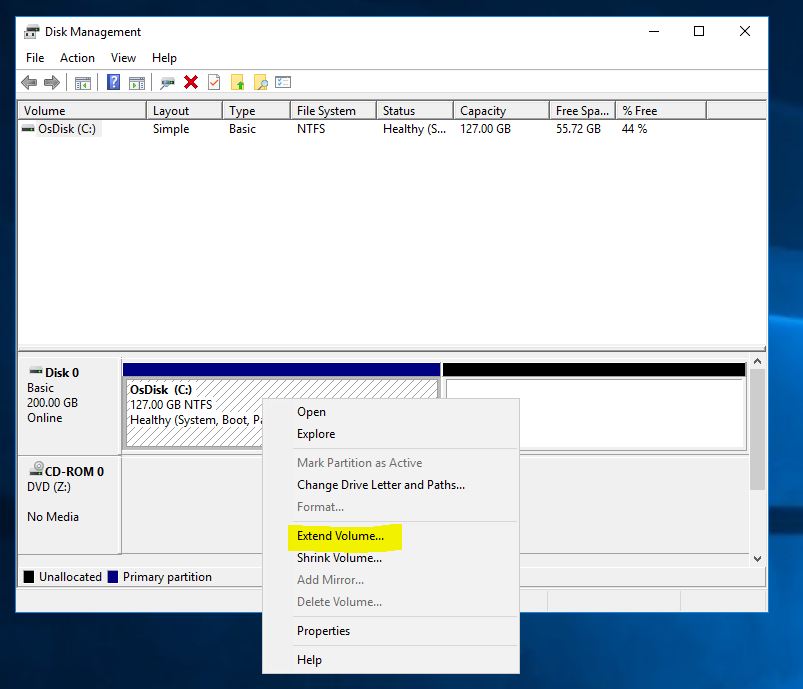
1. Right click on the lower left-hand side of the VM screen in the Windows Icon and select "Disk Management".
2. Right click on the OsDisk 0 rectangle and select the "Extend Volume…" option.
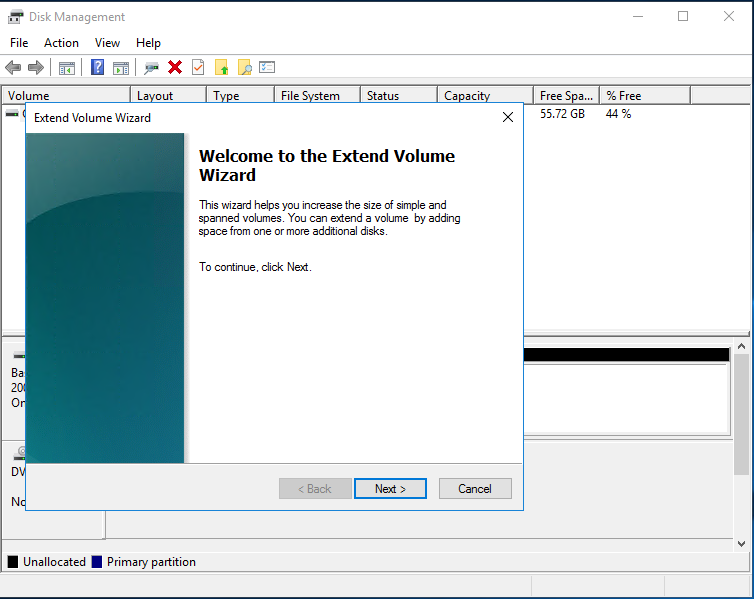
3. A wizard screen will pop-up, click on the "Next" button.
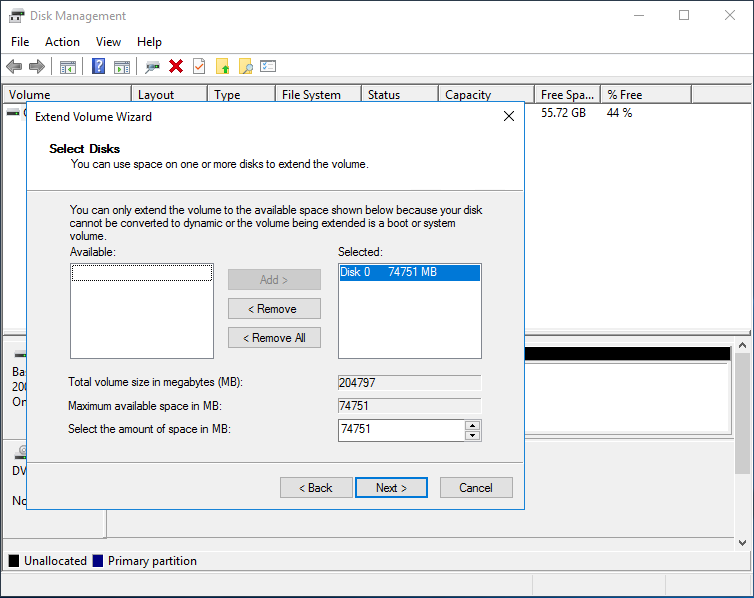
4. Don't modify anything and click on the "Next" button.
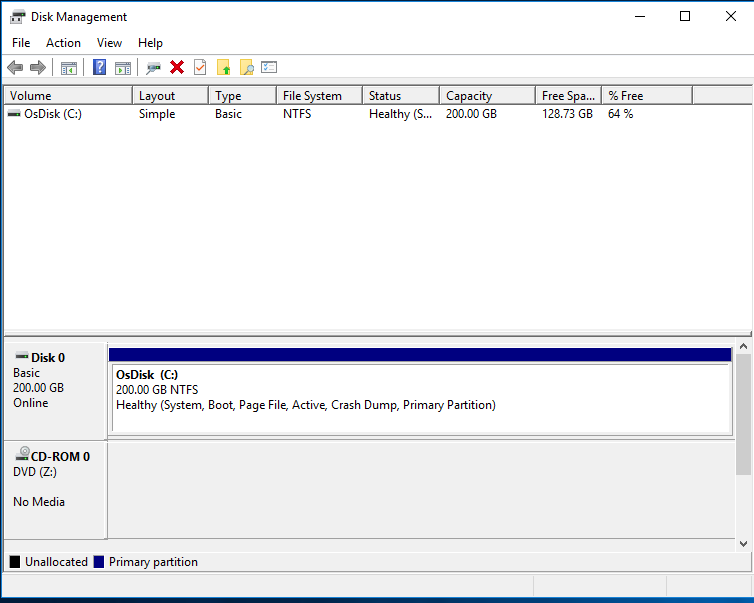
5. Click on the "Finish" button.

6. The hard drive will now have a capacity of 200GB.
Change the Log On Account for Dynamics 365
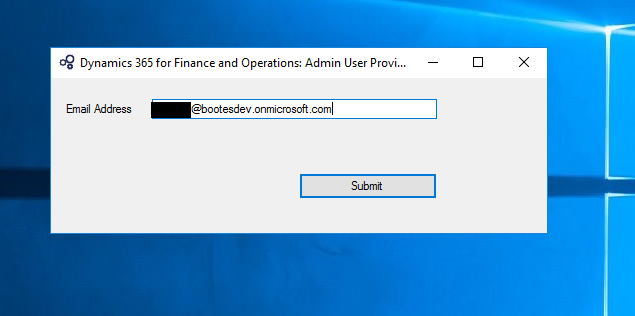
Another item that has to be configured is the log-on account for Dynamics 365 for Finance and Operations. You can change your log-on account to the account that you're using to log on to LCS (Lifecycle Services) for Dynamics 365 (someone@somecompany.onmicrosoft.com). You can also use your organization's microsoft account (somename@somecompany.com). By completing this step you'll be able to log-on to D365 only by typing a URL in Internet Explorer and without having to establish a debug session via Visual Studio.
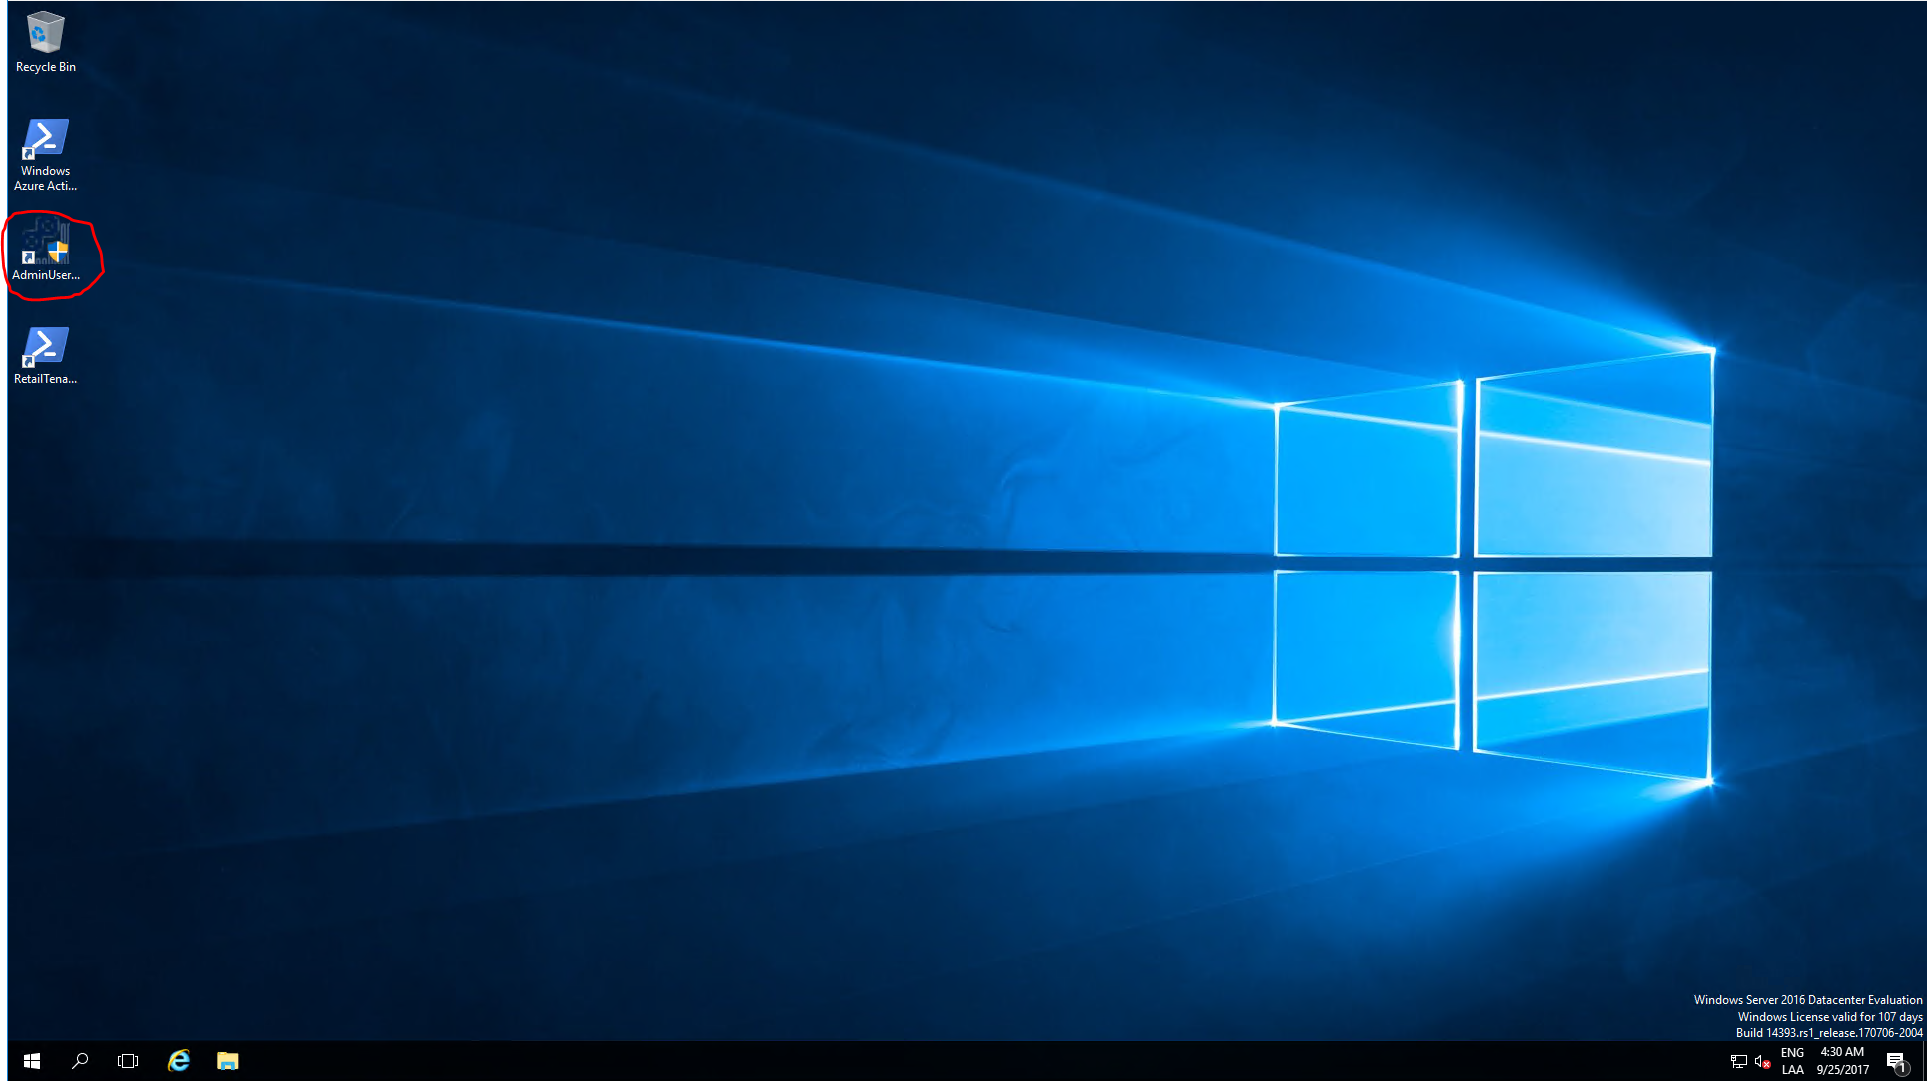
1. Click on the AdminUserProvisioning short cut on the desktop.
2. Enter your LCS or your organization's Microsoft Account. Click on the "Submit" button.
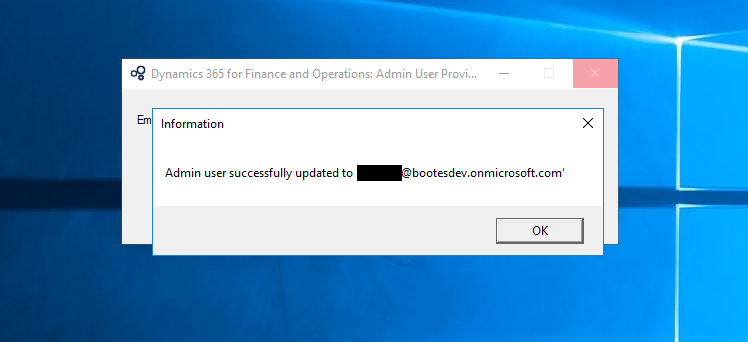
3. After about a minute you will get a confirmation dialog.
Now you can log on to your Dynamics 365 for Finance and Operations.
1. Open Internet Explorer.
2. Change the URL of the browser to https://usnconeboxax1aos.cloud.onebox.dynamics.com.... You will be taken to a log on screen. Enter your credentials.
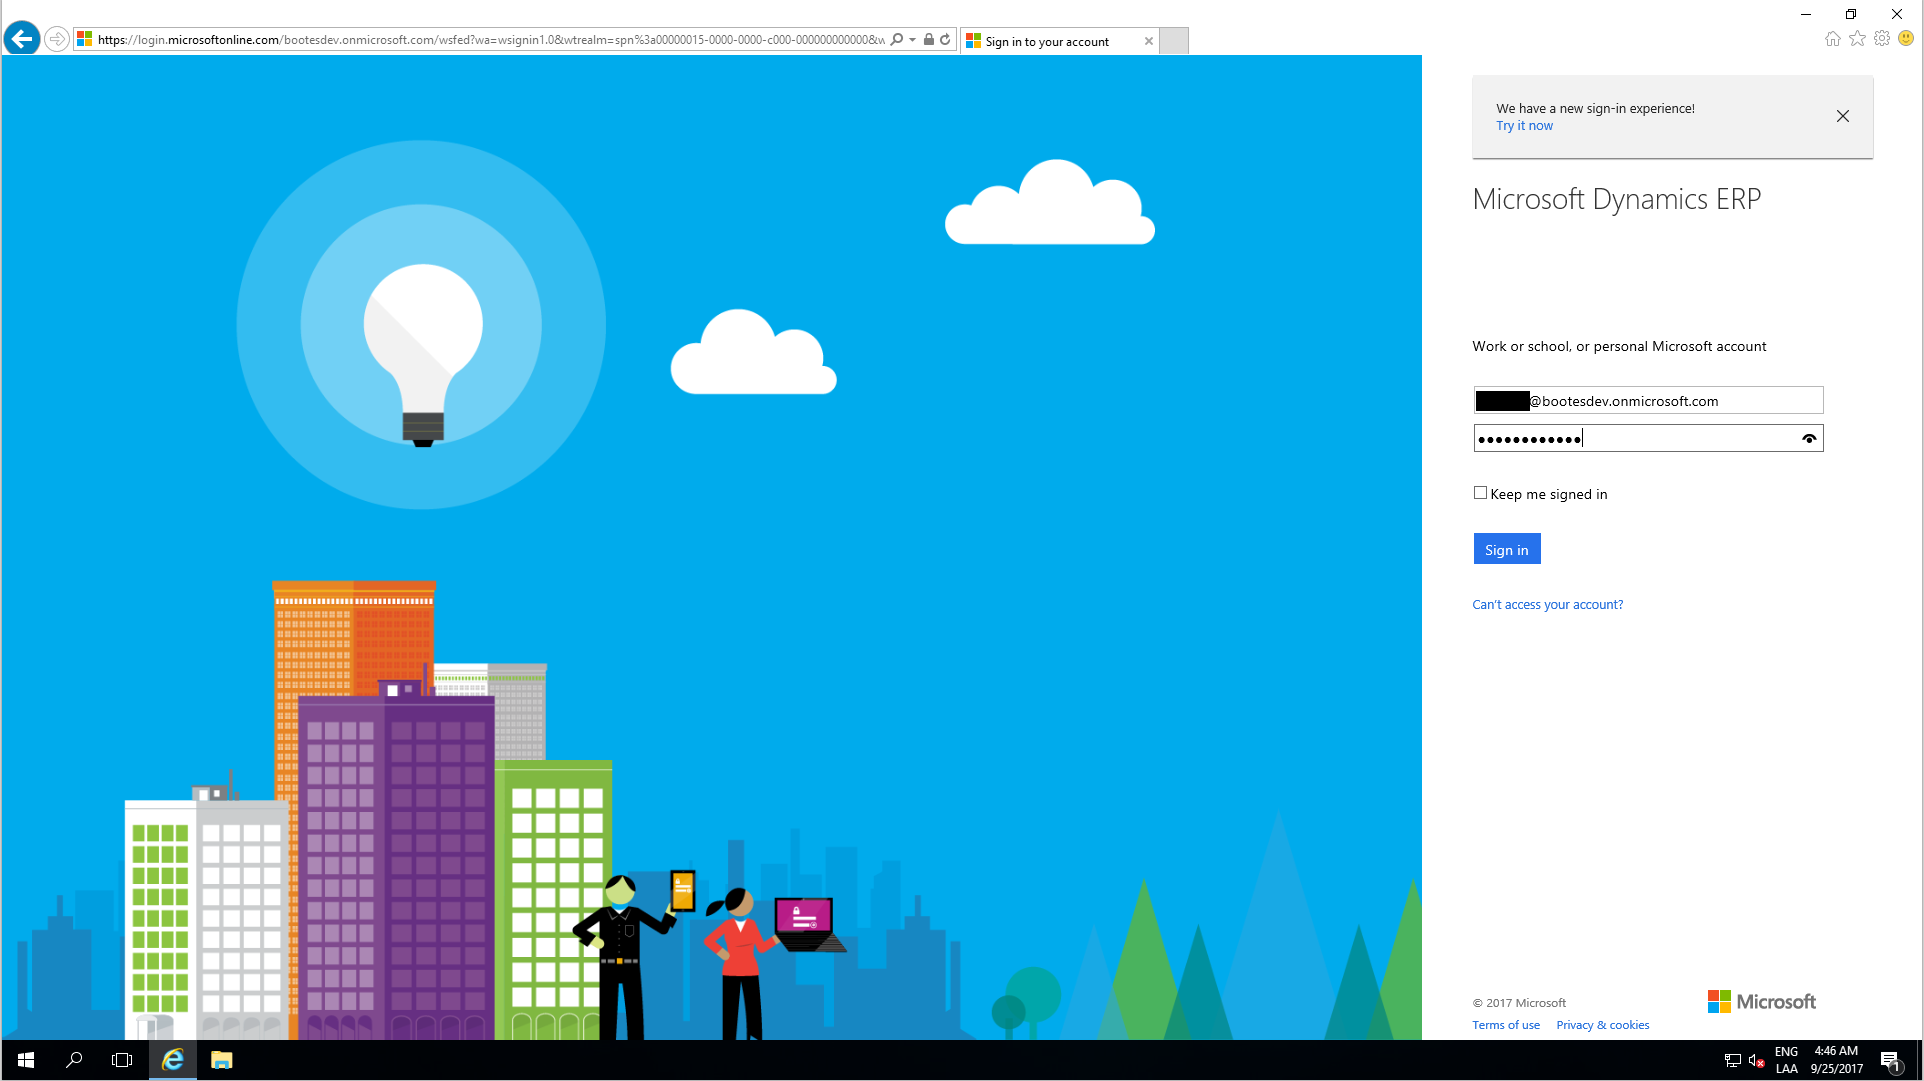
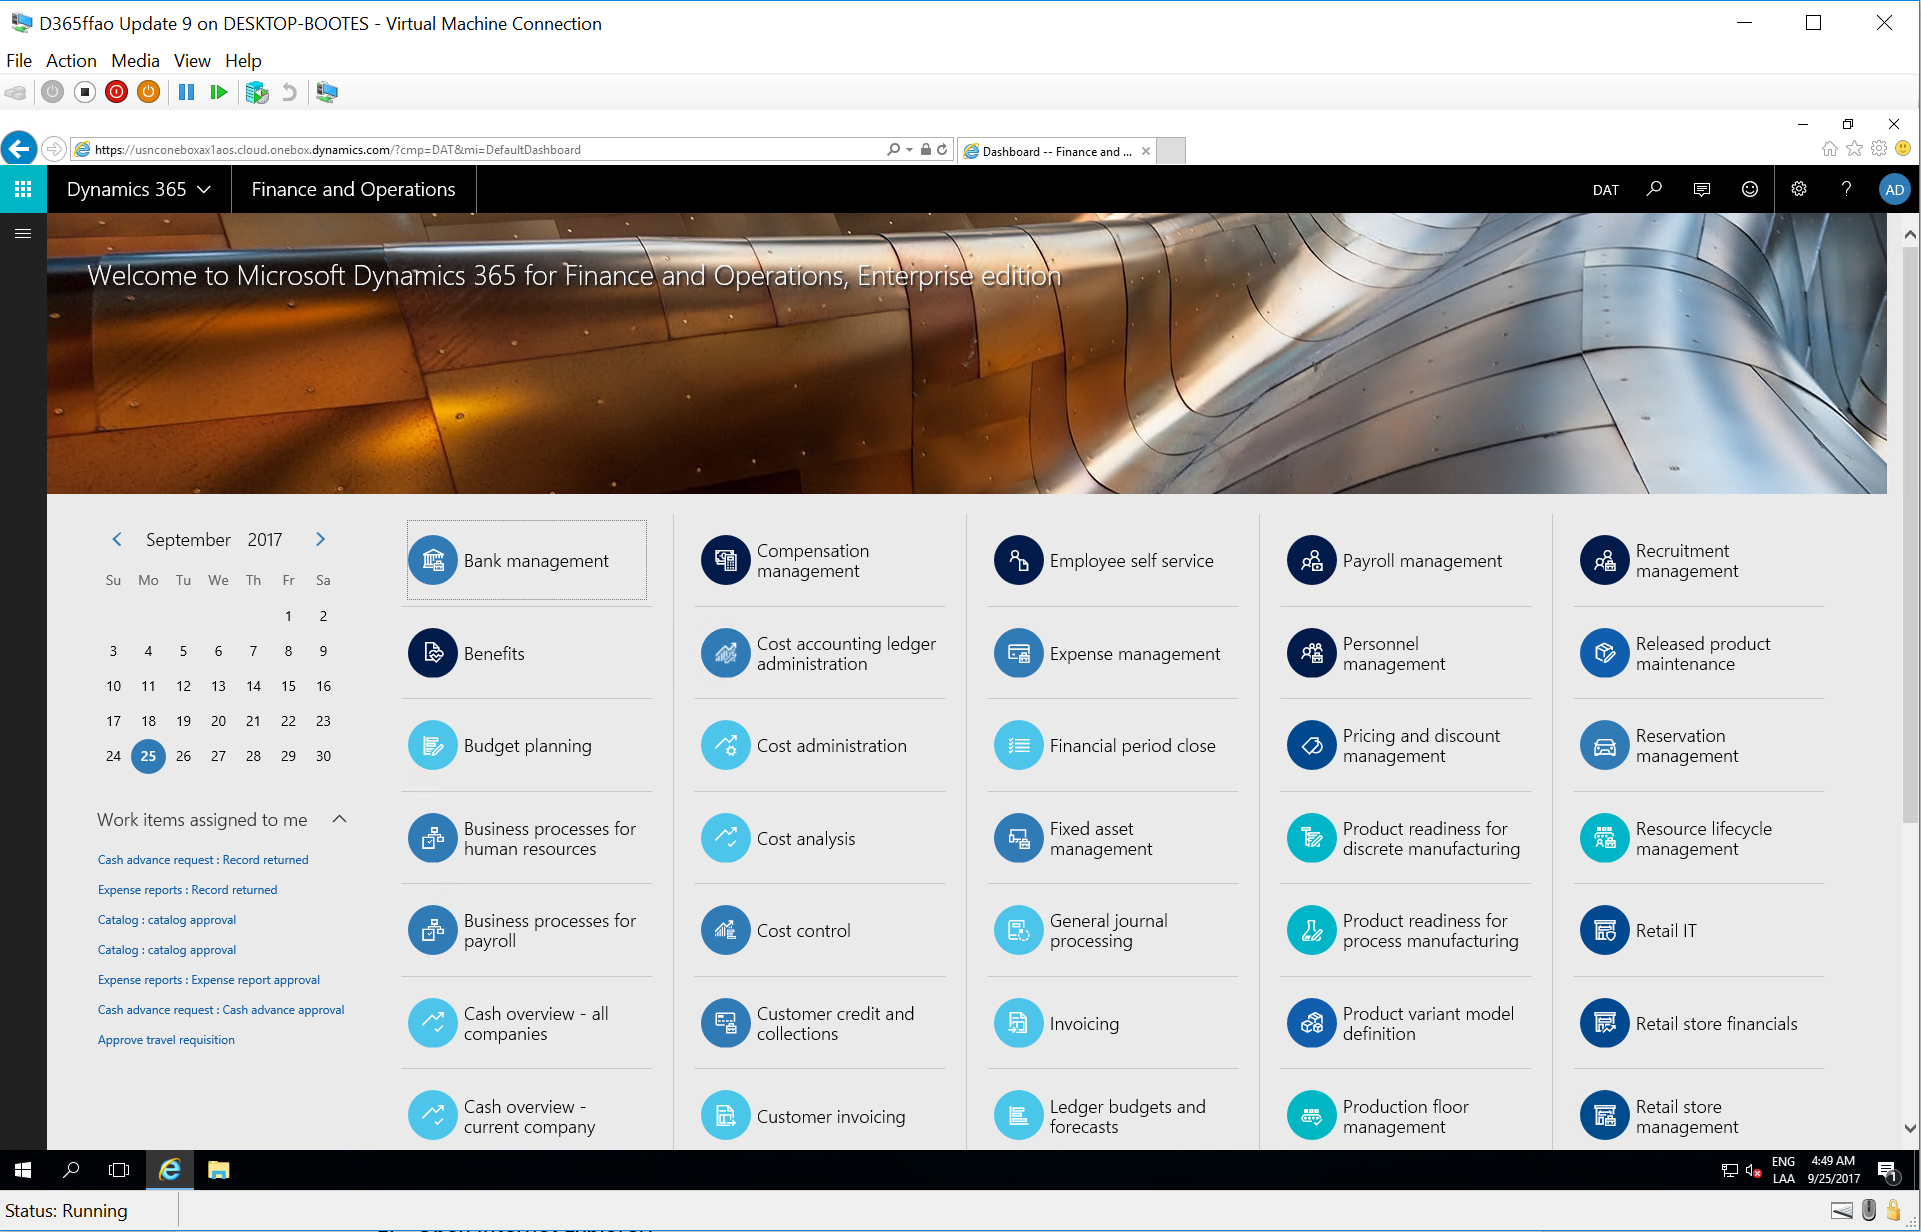
3. Once you're authorized the browser will navigate to the main Dynamics 365 for Finance and Operations menu.
Important: You might run into a case (eg: Update 12 with 7.3) where no matter how many times you enter the correct credentials into the browser, it will ask you for the credentials over and over again. This is because there is a problem with the "C:\AOSService\PackagesLocalDirectory\Bin\DynamicsDevConfig.xml" file. You need to open this file in Notepad (with elevated permissions) and change the "OfflineAuthenticationAdminEmail" to the e-mail you specified in the steps above, and then save the file.
Rename the Computer
Visual Studio Team Services (VSTS), formerly known as Visual Studio Online, the source code management repository tool that's used with D365 to make teamwork possible uses a concept known as workspaces. You can find more about workspaces by following this link: https://docs.microsoft.com/en-us/vsts/tfvc/create-.... Workspaces require that every computer or VM have a unique name. VSTS team integration will fail if you have two or more VMs that have the same name. Therefore, it is crucial that you rename your VM.
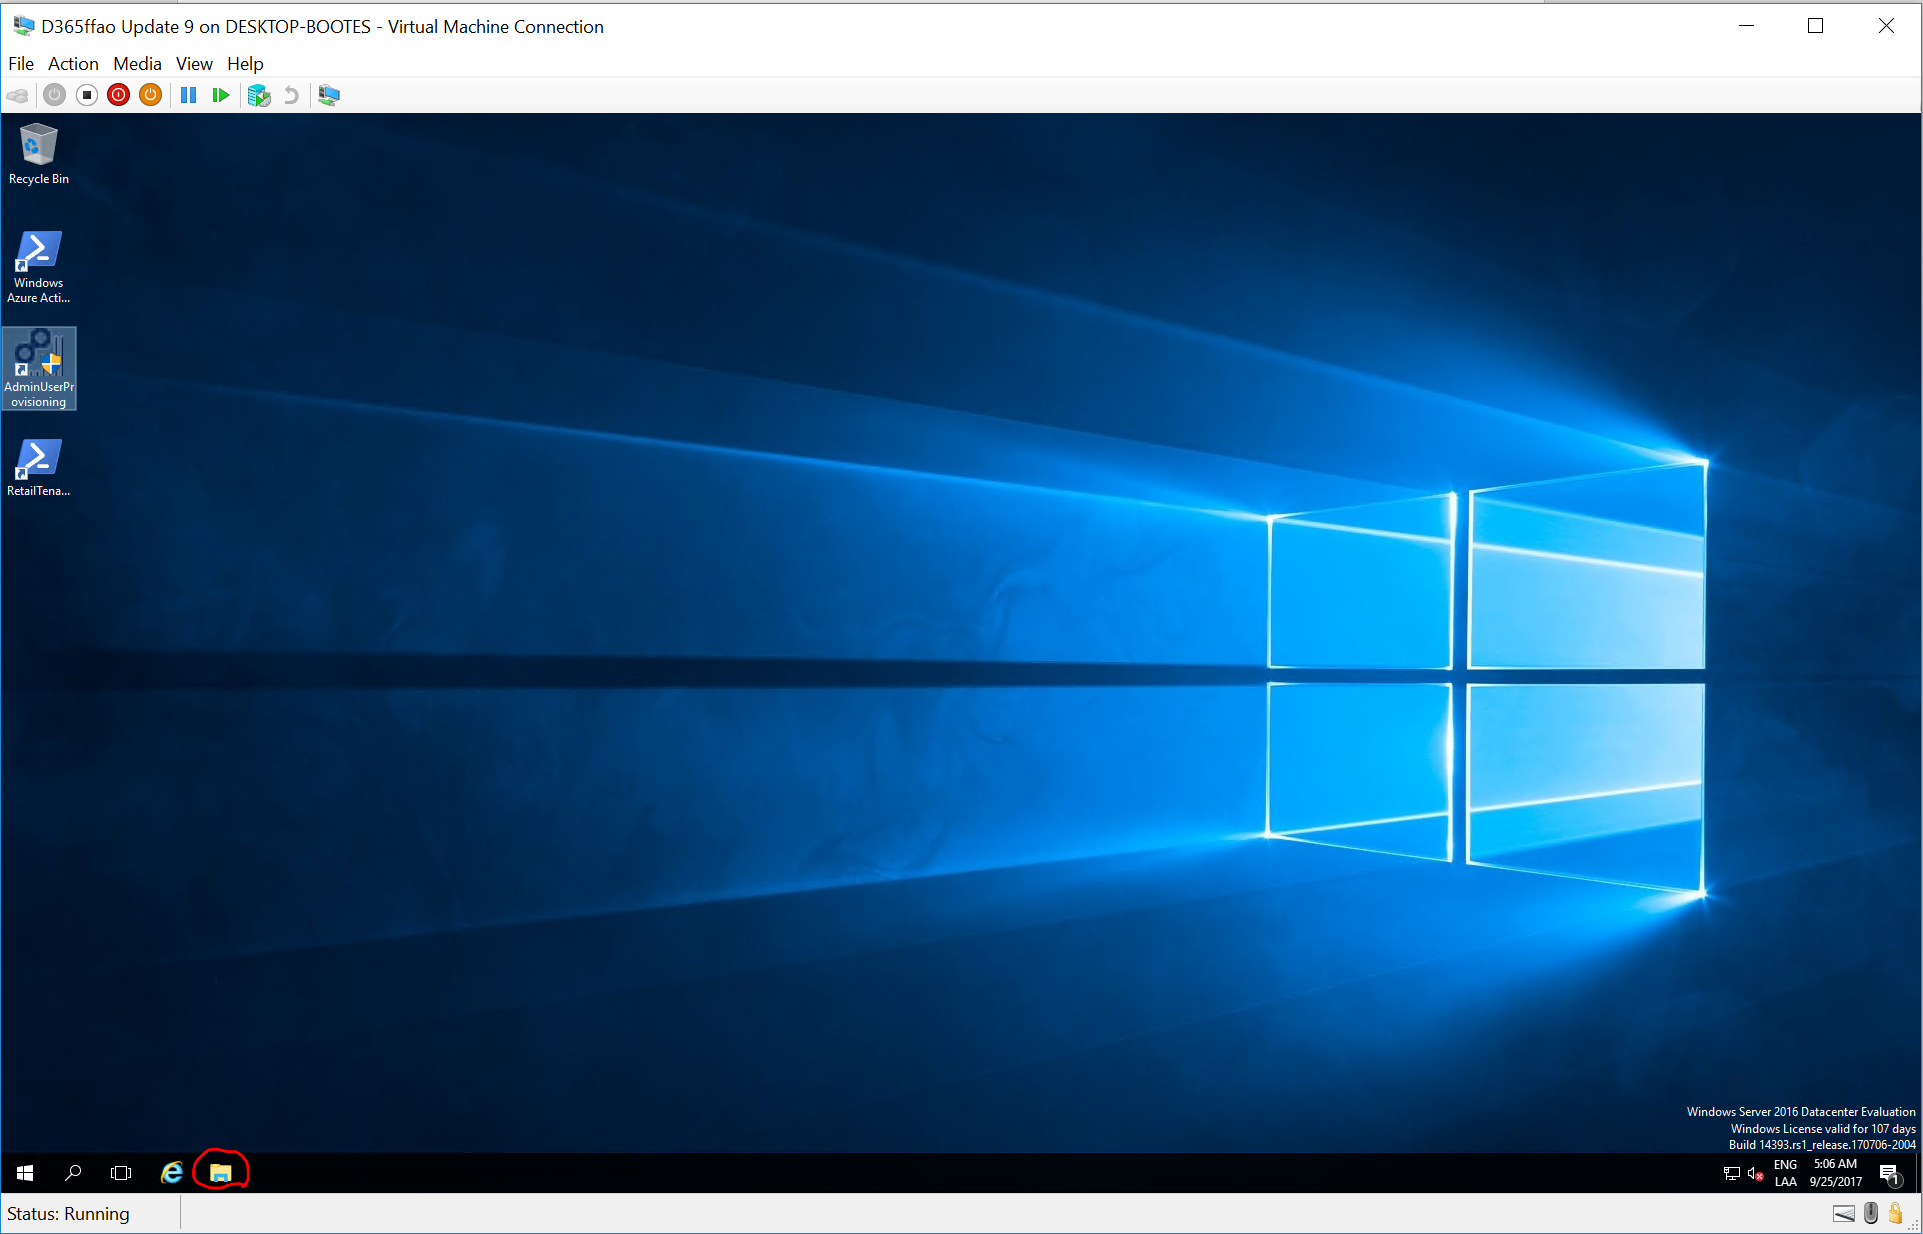
1. Open the Windows Explorer, by clicking on the shortcut in the lower left corner:
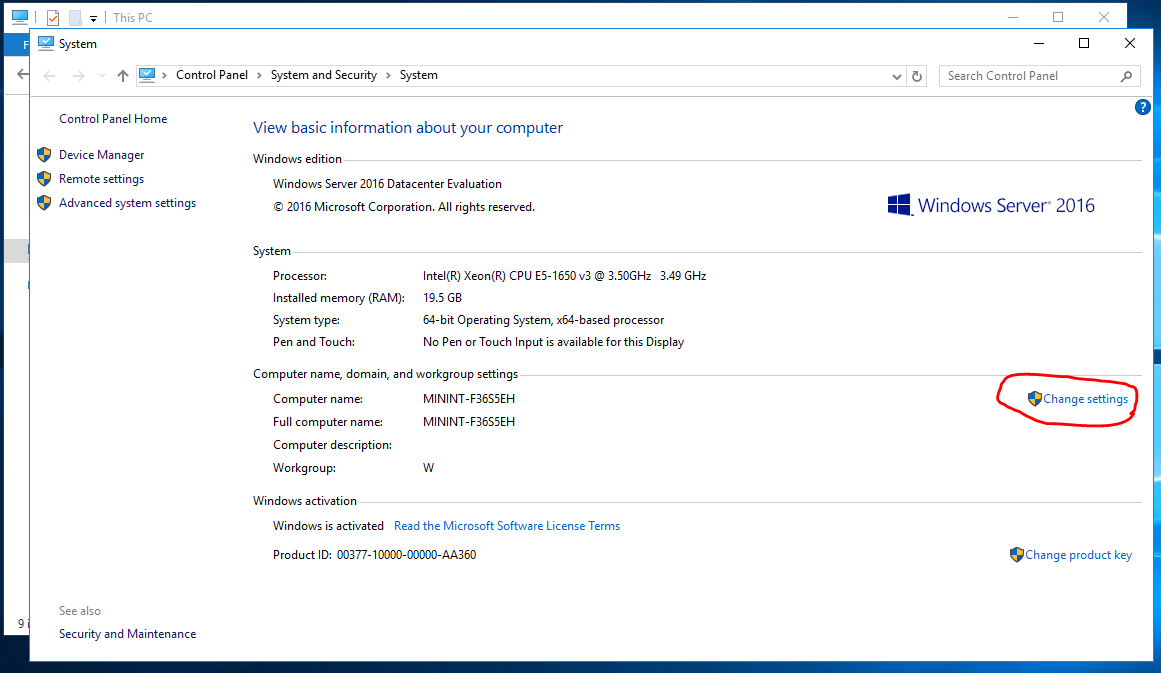
2. Right click on My PC in the left and select properties.
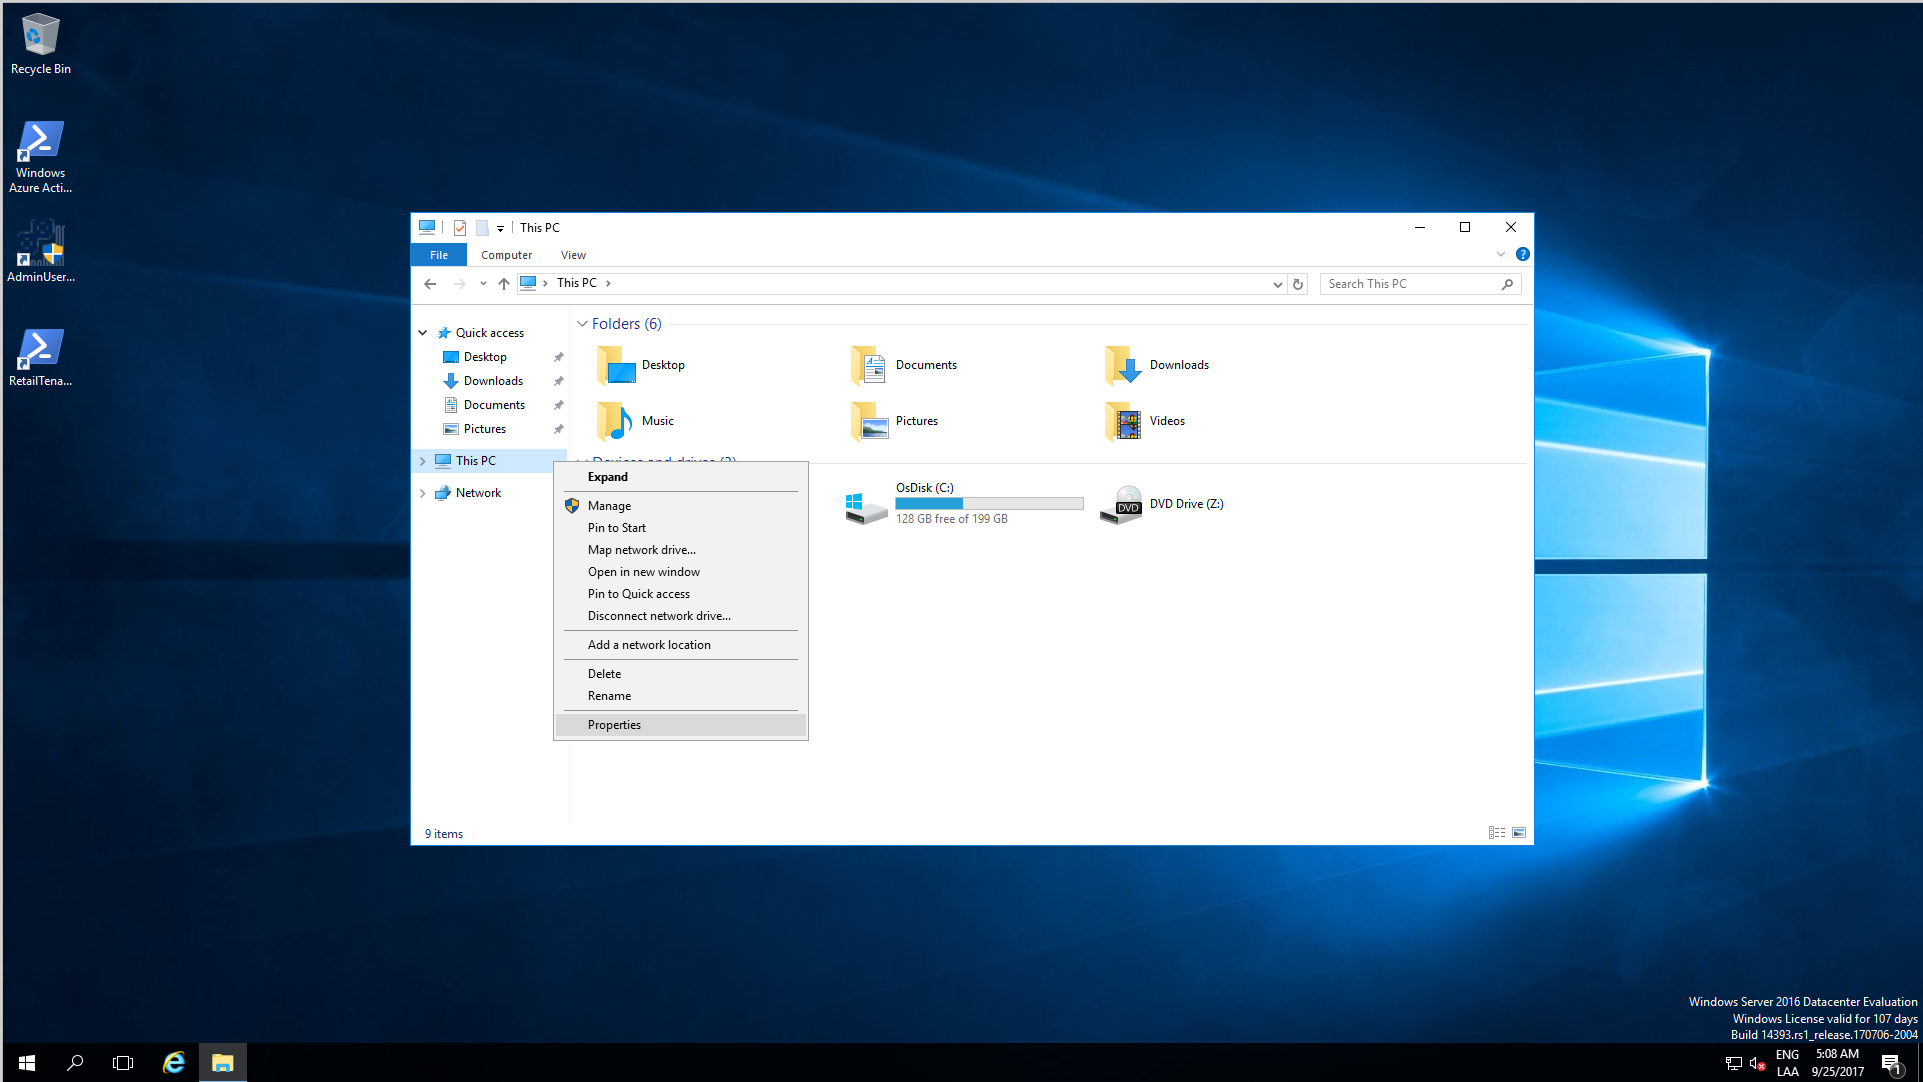
3. Click on the "Change Settings" button.
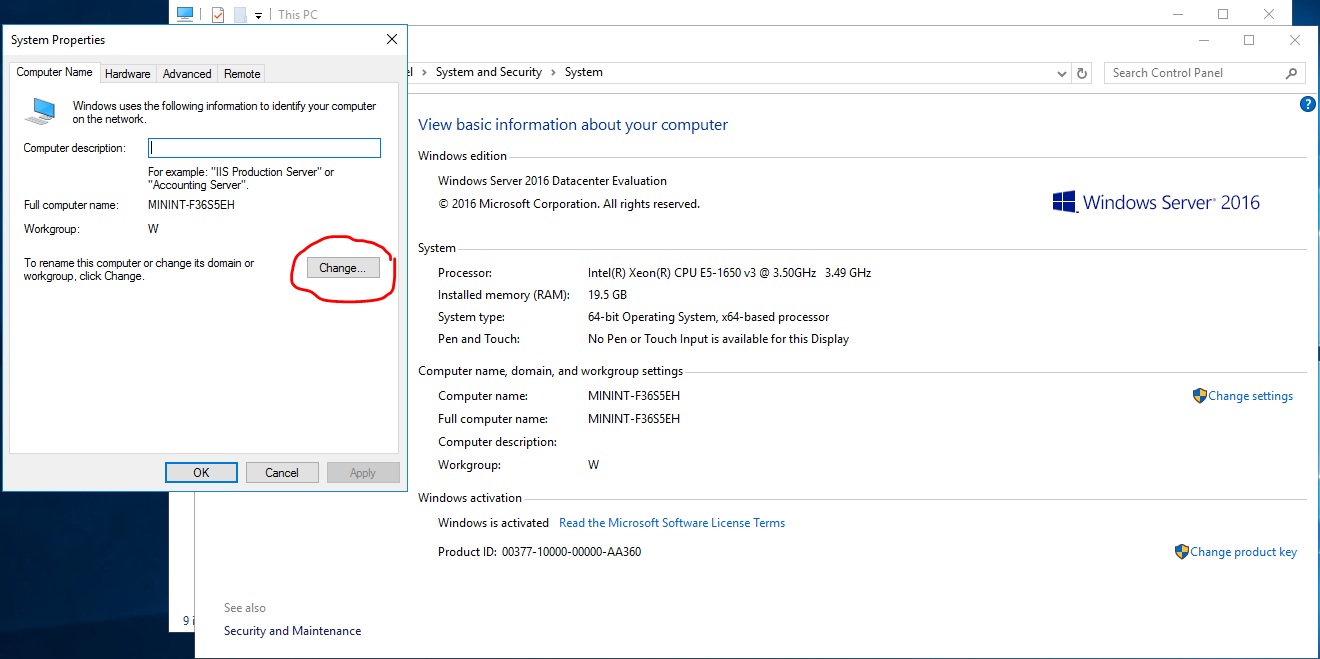
4. Click on the "Change" button in the System Properties -> Computer Name tab.
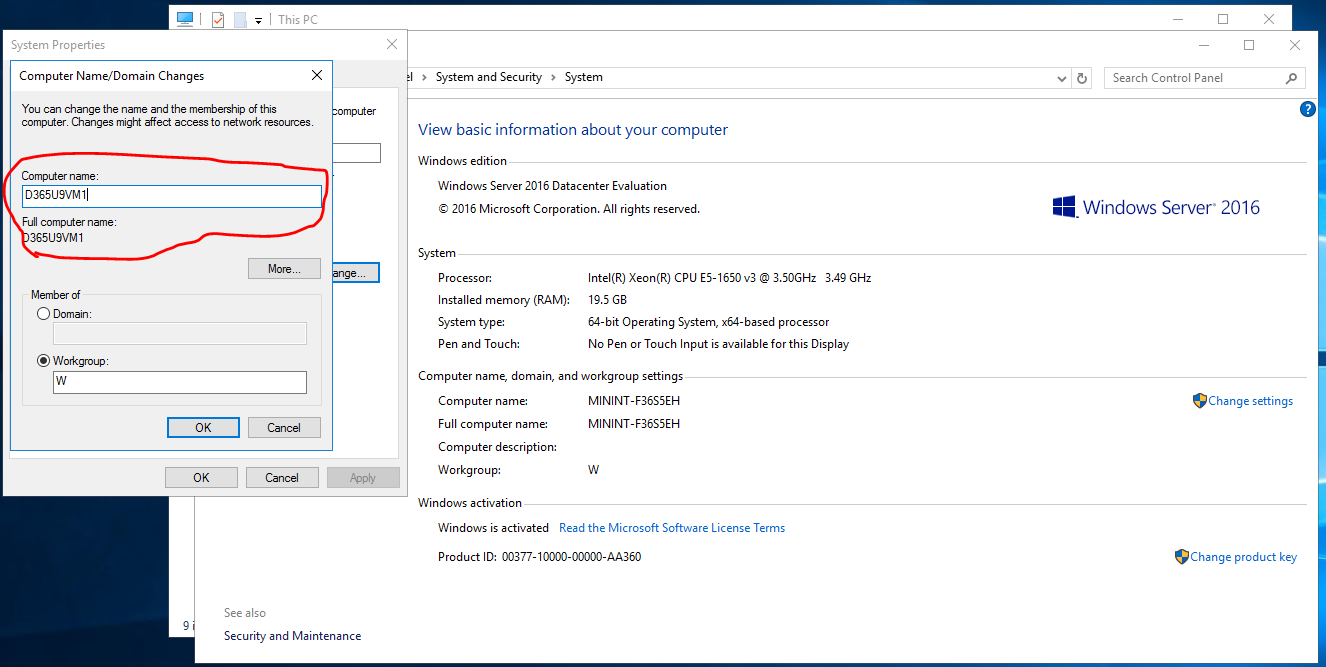
5. Change the computer name to some unique name within your organization and click on the "OK" button.
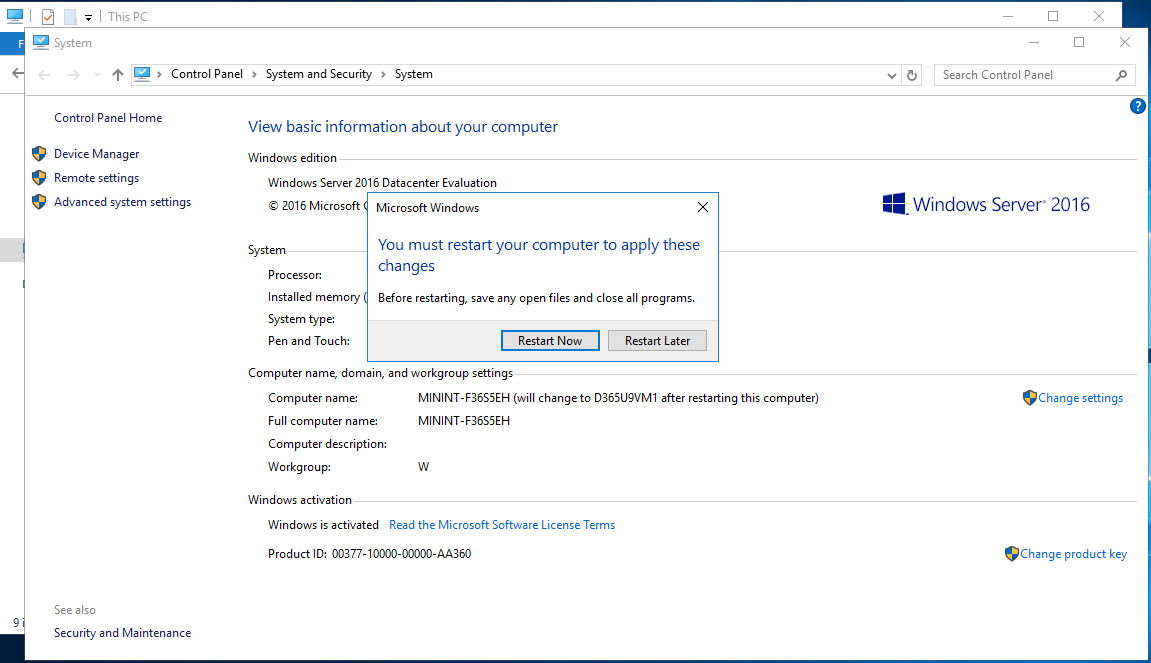
6. You will be informed that you will have to restart your computer, click on the "OK" button. Then click on the "Close" button.

7. You will then be prompted to restart the computer, click on the "Restart Now" button.
The VM will restart and it might take a minute or so. When the VM is ready log back in.
Set Up Visual Studio
The first thing that you will want to do is to setup your development environment. The Dynamics 365 tooling inside Visual Studio requires that you always run VS in administrator mode. The VM comes with Visual Studio 2015 professional edition, it makes no sense to upgrade to the Enterprise edition because the D365 tooling can't take advantage of the advanced features of the VS Enterprise edition.
1. Click on the magnifier icon in the lower left corner and bring up the cortana search box. Type Visual Studio.

2. Right click on "Visual Studio 2015" in the results pane, and then click on "pin to taskbar".
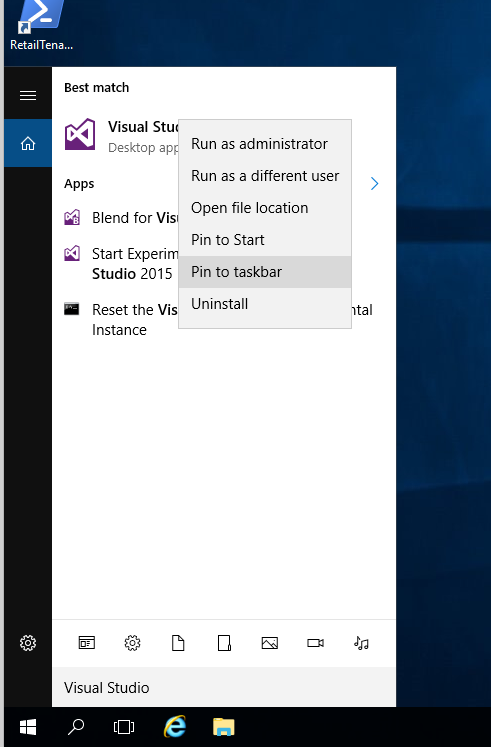
3. Right click on your newly created task bar icon for Visual Studio 2015, then right click again on "Visual Studio 2015" and then click properties.

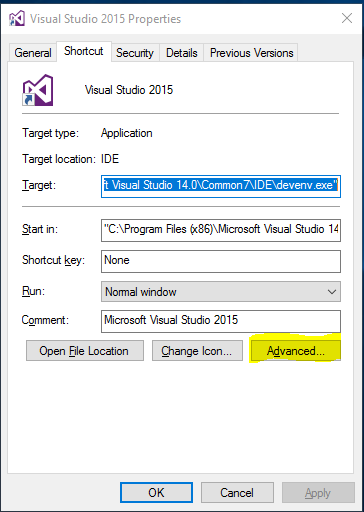
4. Once you get the properties dialog, click on the "Advanced" button.
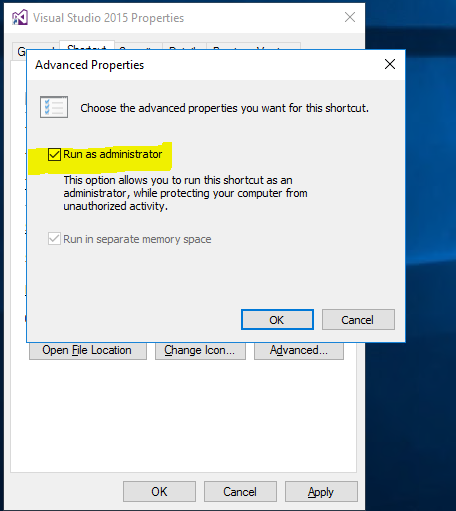
5. Check the "Run as administrator" checkbox and click on the "OK" button. Then click on the "OK" button again to exit the properties dialog.
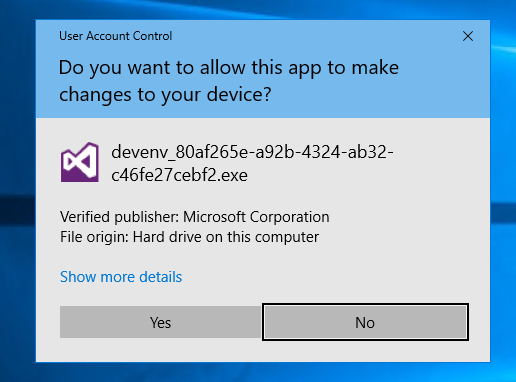
6. Click on the Visual Studio icon in the taskbar. Click on the "Yes" button in the User Access Control dialog.
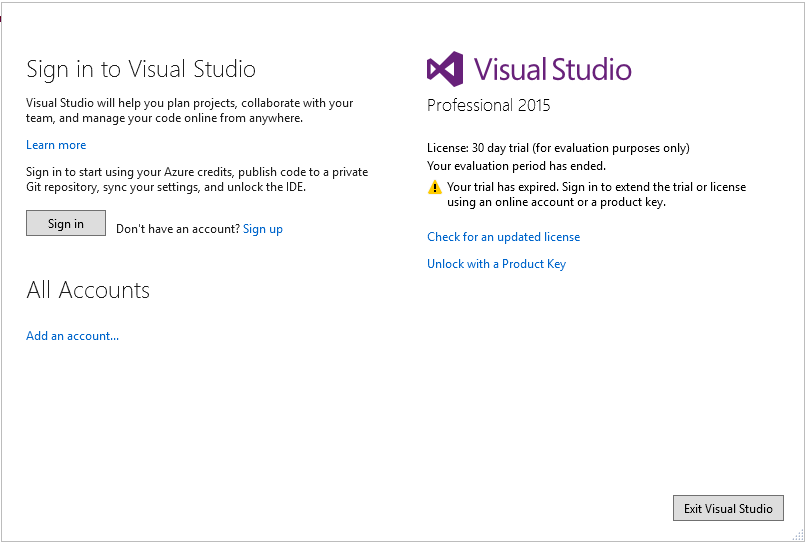
7. Visual Studio will now prompt you to sign in to Visual Studio. Use your MSDN or Action Pack Microsoft account. Make sure that this same account has VSTS access rights, if it does not you can always add additional accounts. Click on the "Sign in" button.
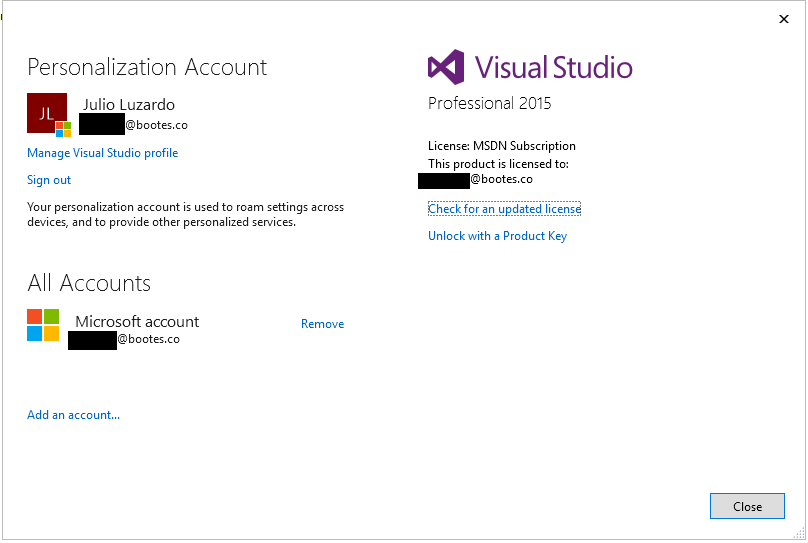
8. Once you're signed in to visual studio you will get this screen which means you've successfully activated Visual Studio:
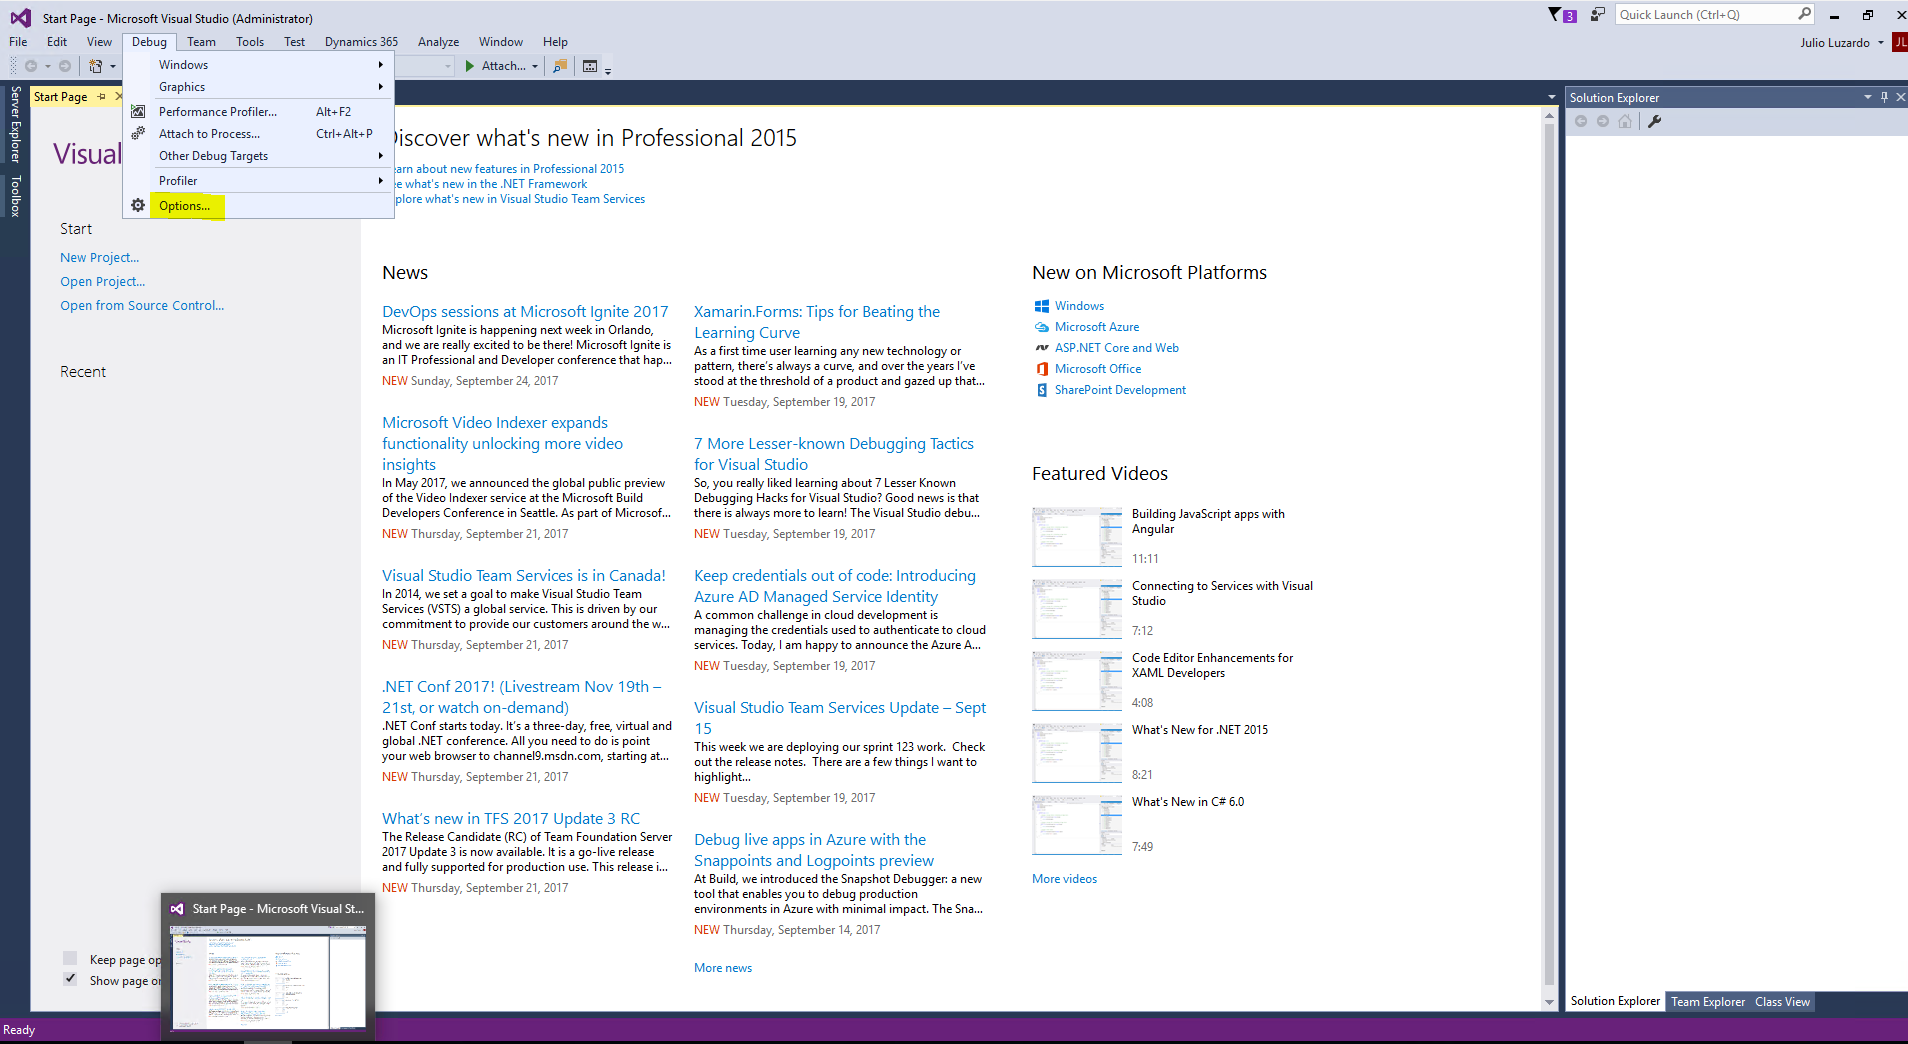
9. Go to "Debug -> Options".
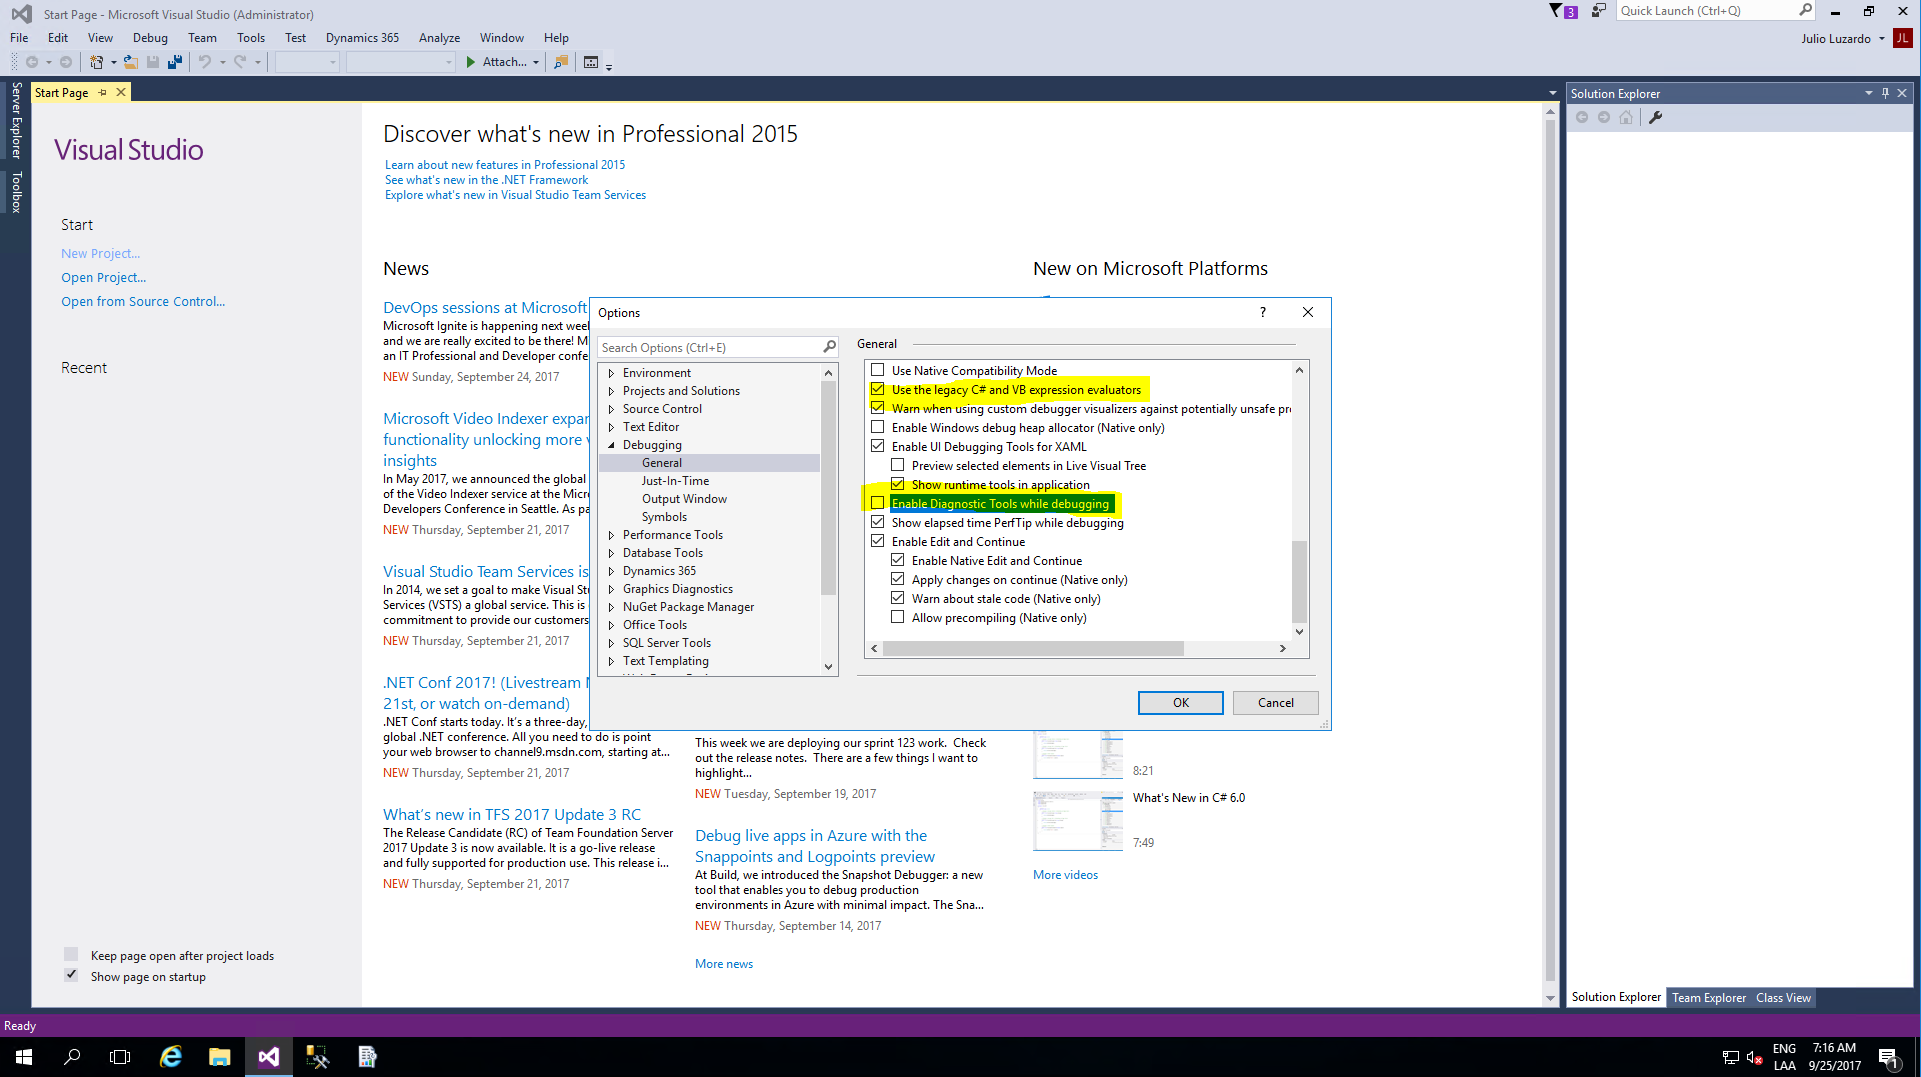
10. Check the "Use the legacy C# and VB expression evaluators" and uncheck the "Enable Diagnostic tools while debugging" and then click on the "OK" button.
Configure SQL Server Management Studio and Reporting Services.
Now we must configure Microsoft SQL Server Management Studio and the Reporting Services Configuration Manager because the computer has undergone a name change.
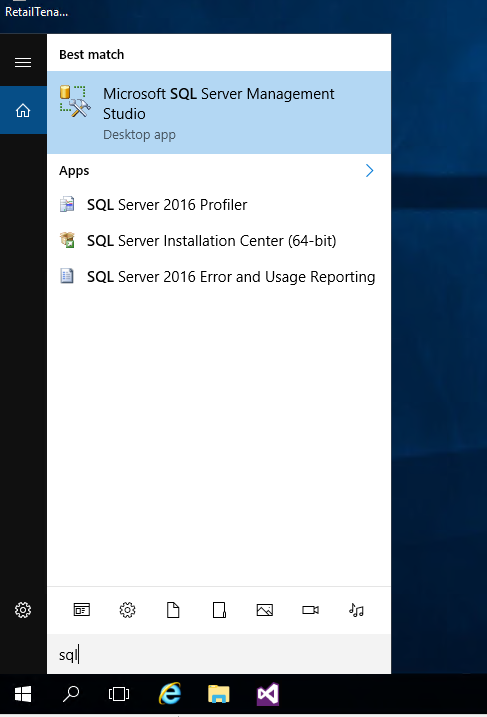
1. Click on the magnifier icon on the lower left-hand side of the screen and type "SQL".
2. Follow the same procedure as we did with Visual Studio to pin it to the task bar and run the program as an administrator.
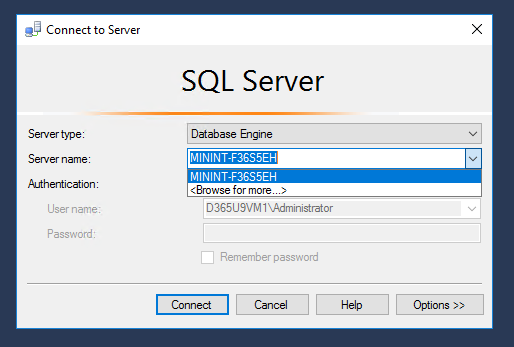
3. Once you're ready click on the SQL Server Management Studio icon in the task bar. Click on the "Yes" button in the User Access Control dialog. The server name will still be the computer's old name. Click on the down arrow in the combo box and click on "browse for more".
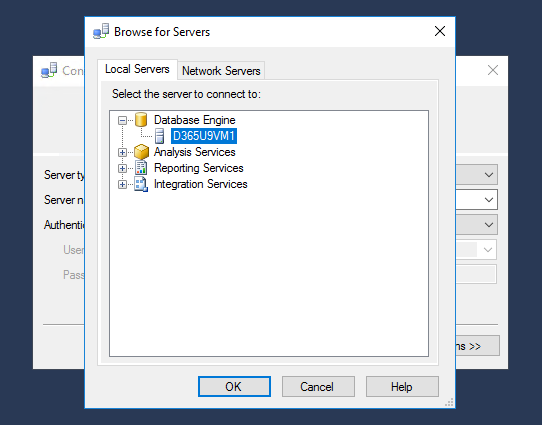
4. Select your VM from the "Database Engine" list.
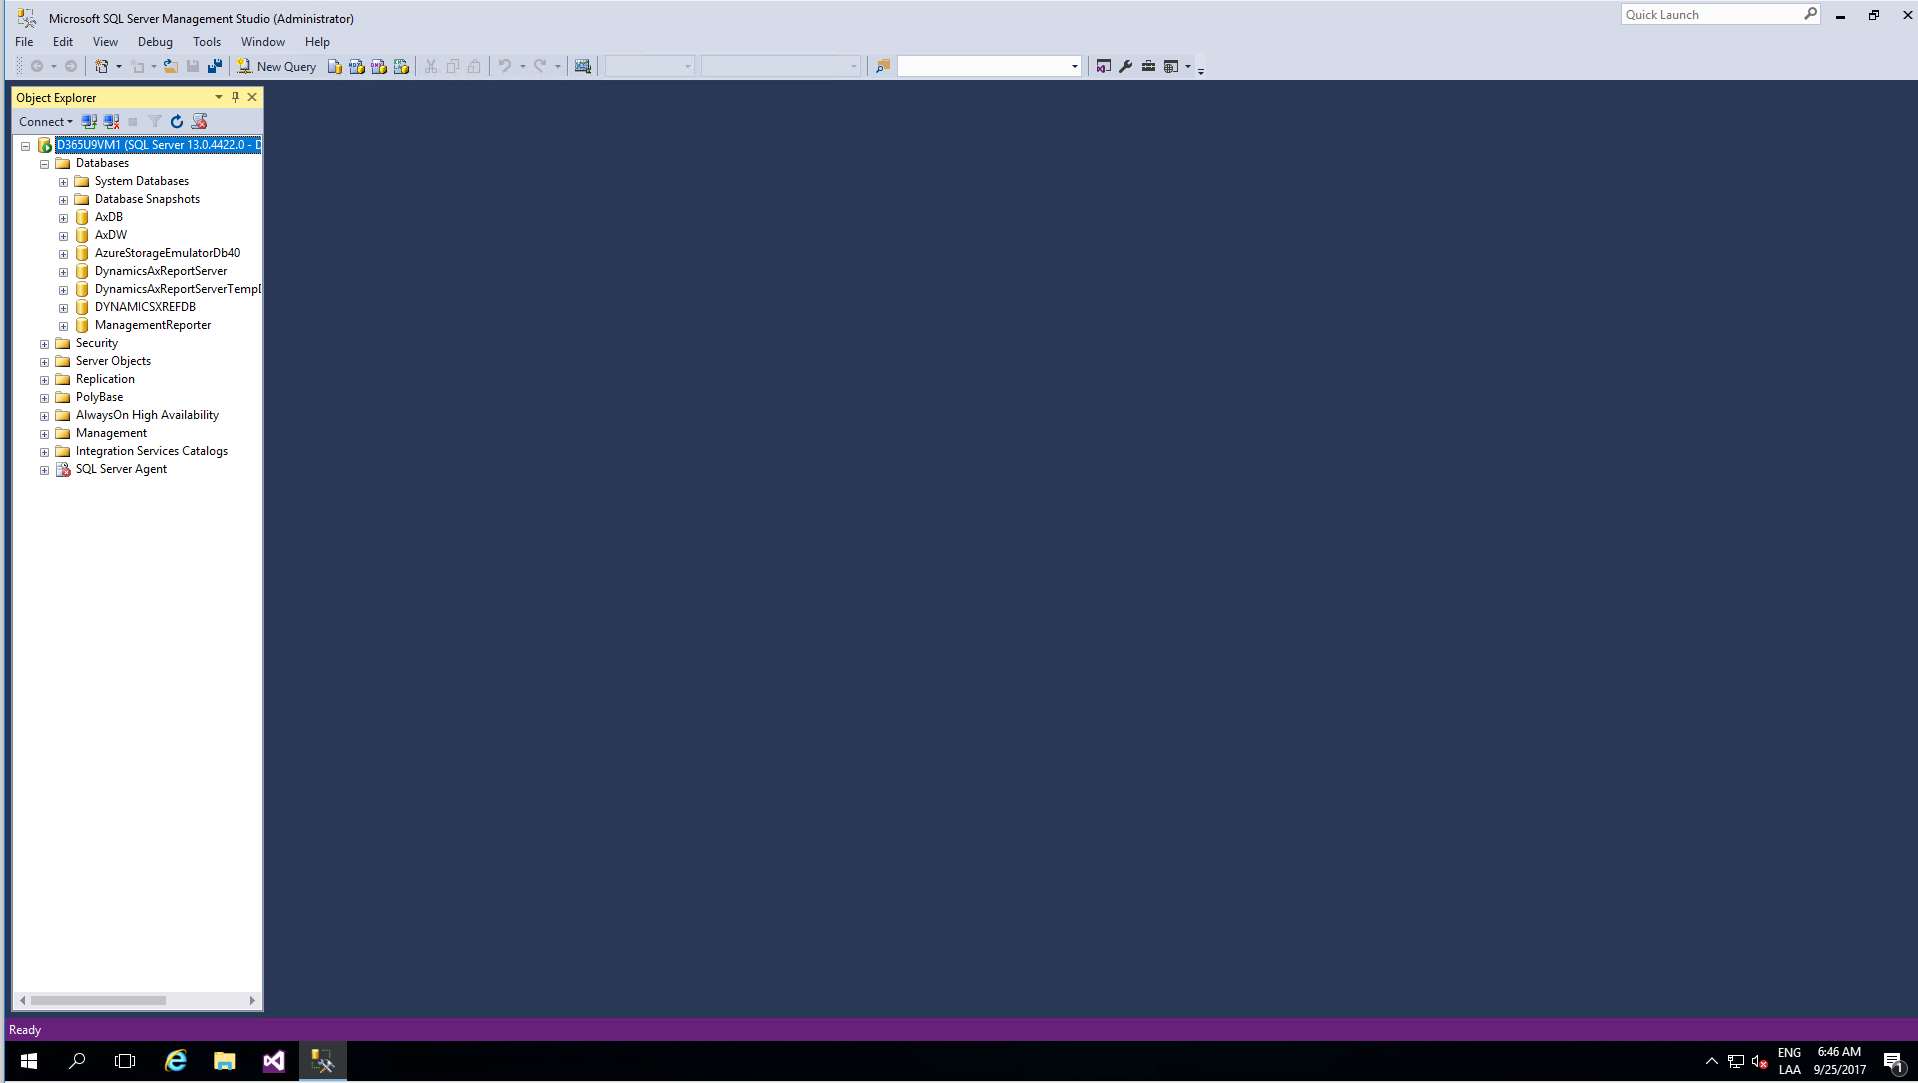
5. Click on the "Connect" button and the SQL Server Management Studio will now show the D365 databases for the VM.
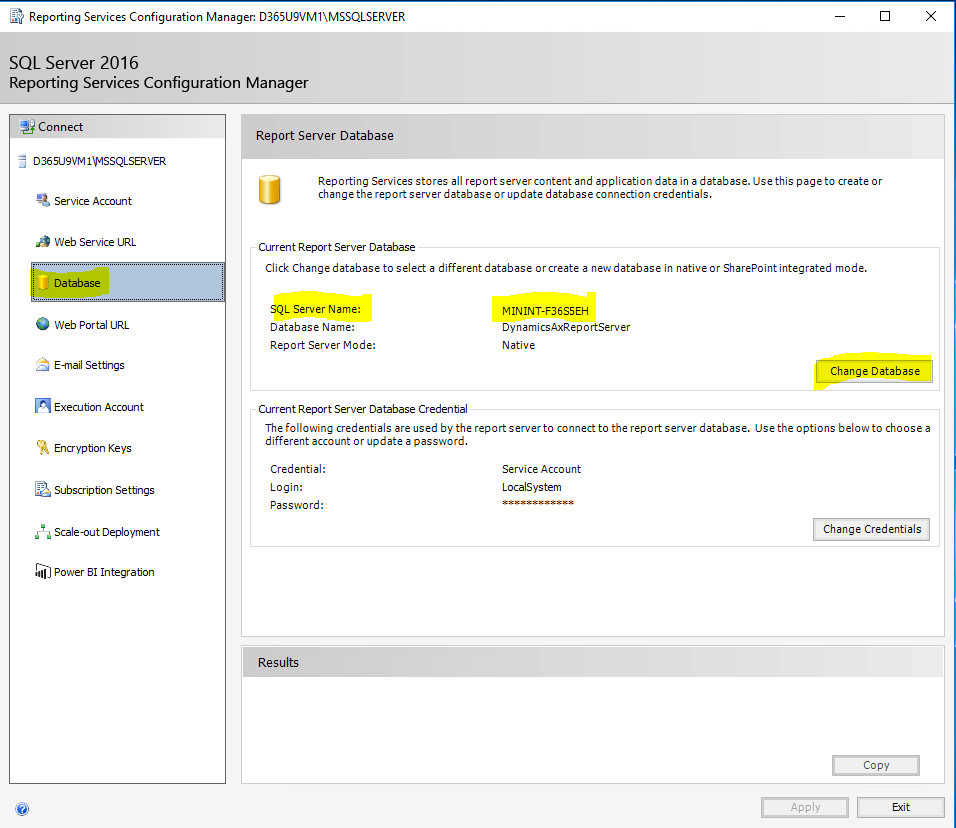
The Reporting Services Configuration is also pointing to the wrong computer name. This has to be changed or else any report you create in your one-box environment will not run.
1. Click on the magnifier icon in the lower left-hand side of the screen and type Reporting.

2. Follow the same procedure as we did with Visual Studio to pin it to the task bar and run the program as an administrator.
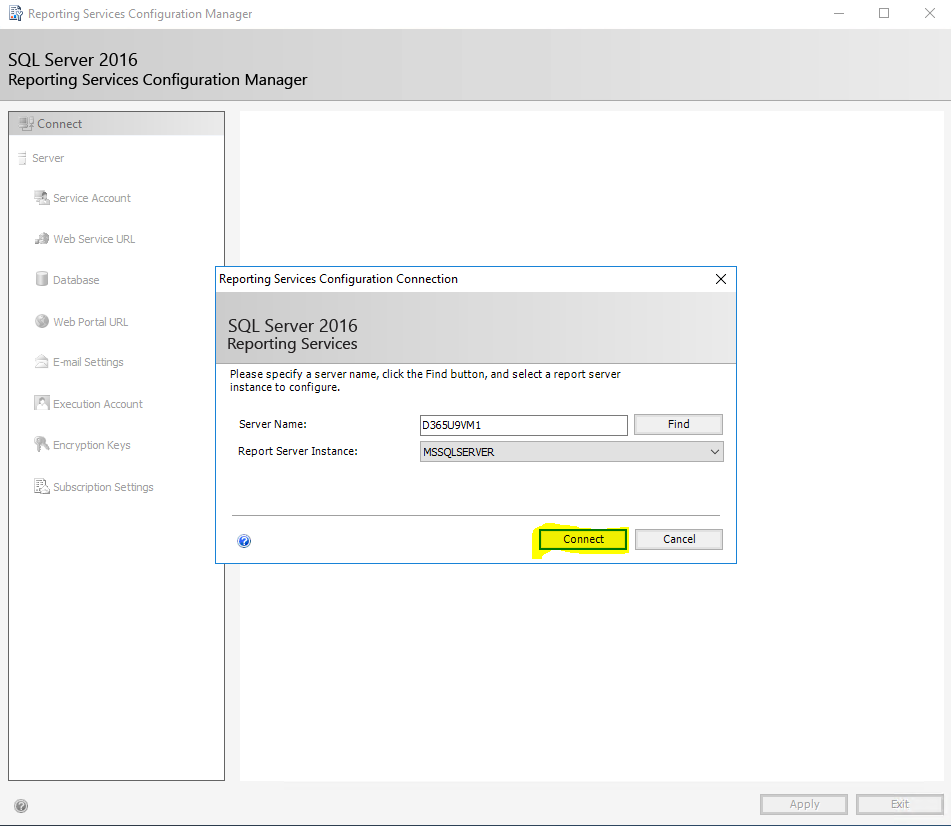
3. Once you're ready click on the Reporting Services Configuration Manager icon in the task bar. Click on the "Yes" button in the User Access Control dialog. Click on the "Connect" button.
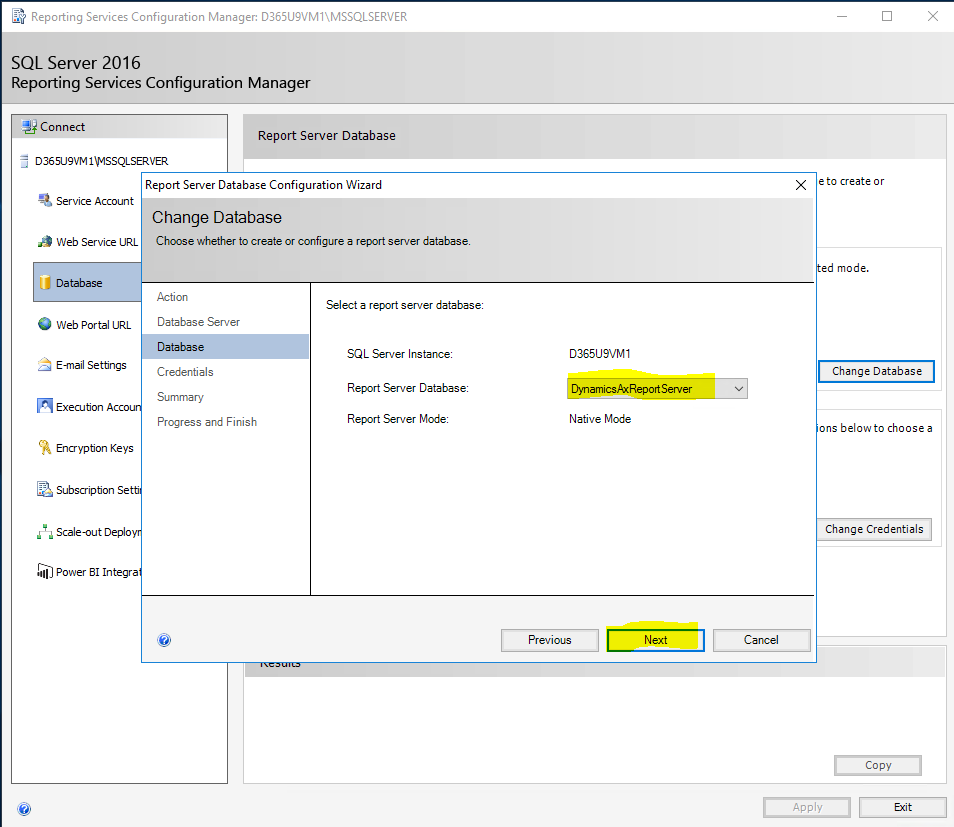
4. Click on Database on the left. You will notice that it is still pointing to the old computer name. Click on the "Change Database" button.
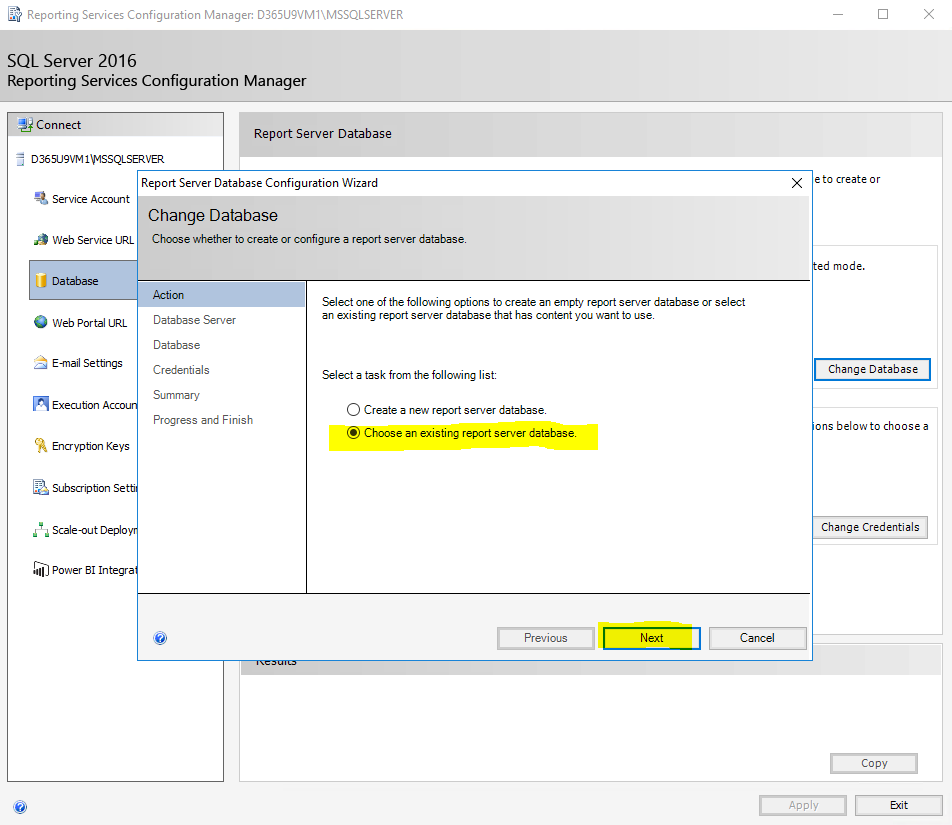
5. Select "Choose an existing report server database" and click on the "Next" button.
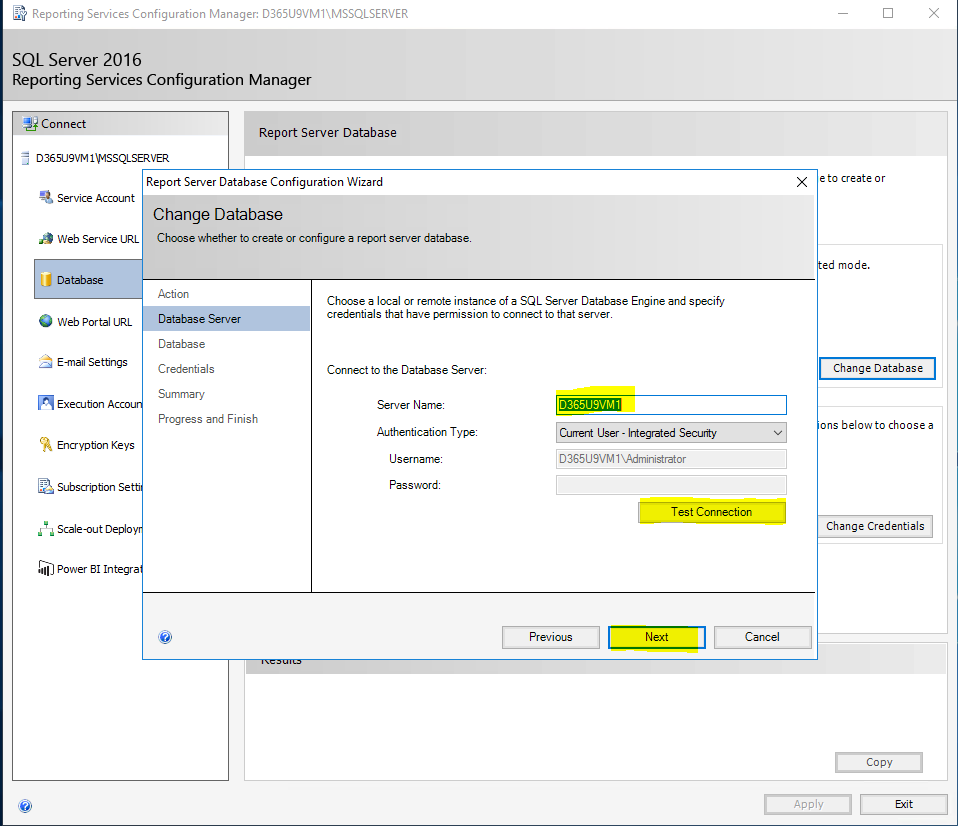
6. Type in the new computer name, then click on the "Test Connection" button and then on the "Next" button.
7. Select the "DynamicsAXReportServer" option and click on the "Next" button.
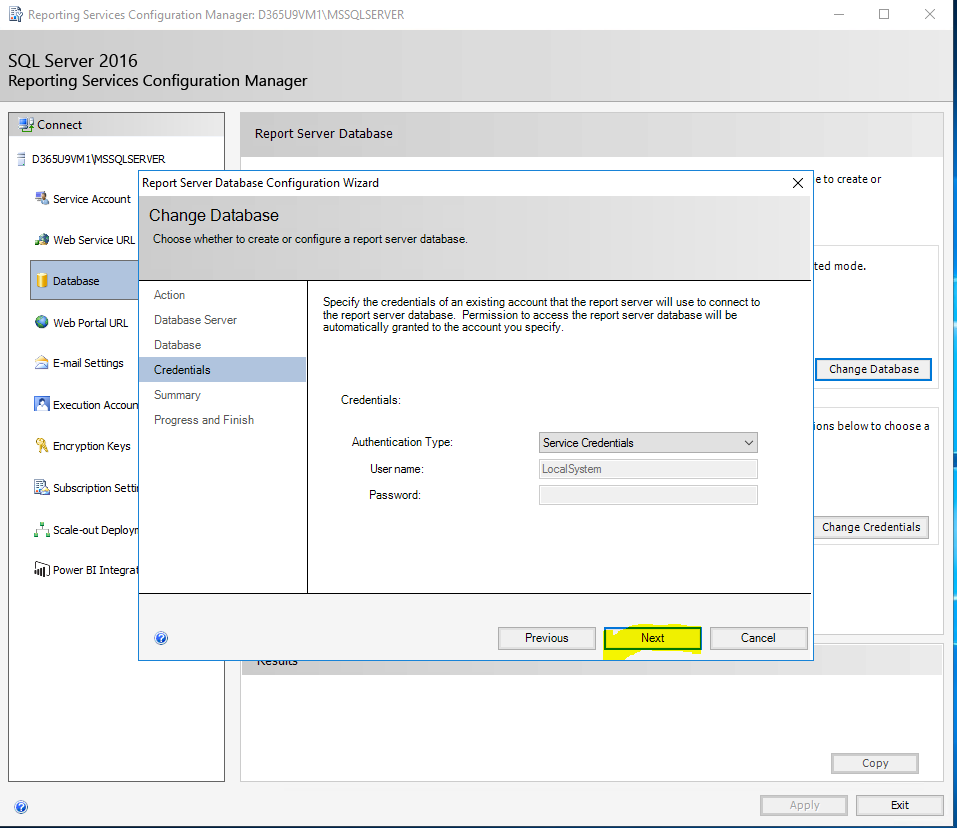
8. Click on the "Next" button in the credentials tab.
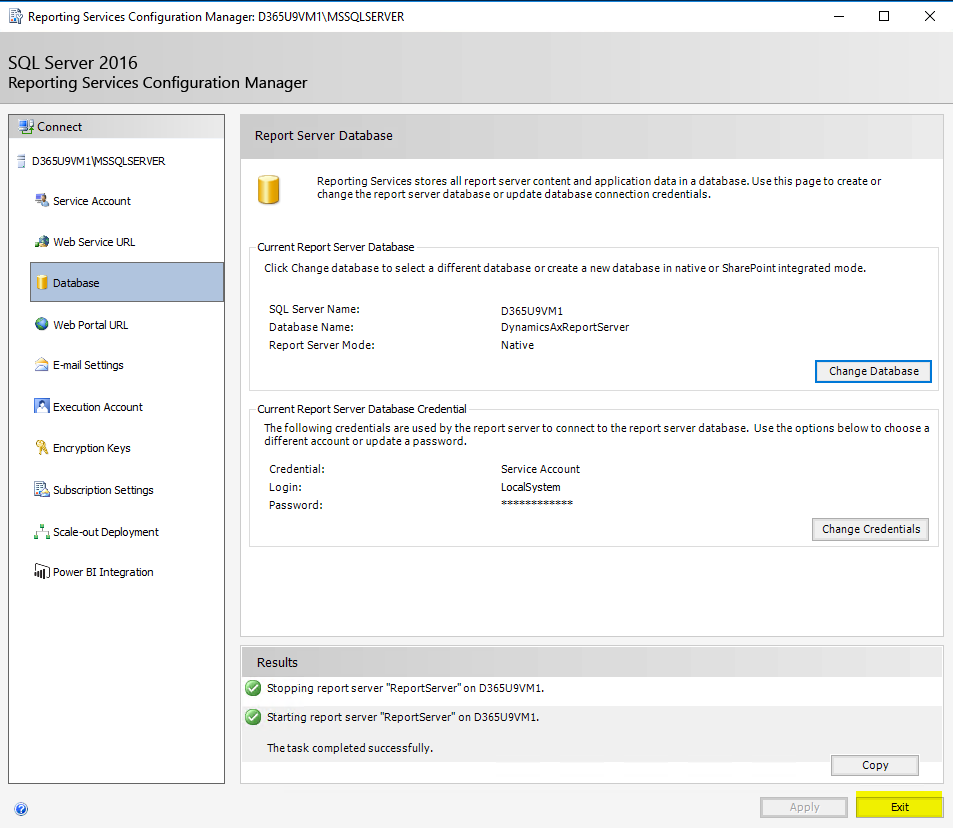
9. Click on the "Next" button in the summary tab and click on the "Finish" button in the progress and finish tab.

10. Click on the "Exit" button to close the Reporting Services Configuration Manager.
Activate or Rearm the Windows Datacenter License.
The Windows 2016 DataCenter evaluation license that comes with the VHD is only valid for 180 days, sometimes even lower than that. You might want to have your development VHD active for a number of months beyond the trial period. You can do this by rearming the operating system by entering the following in an elevated command prompt:
slmgr –rearm
Of course this will only be a temporary measure. The operating system will only allow a finite series of rearms. You can check the number of rearms you have left with this command:
slmgr -dlv
For a permanent solution you will need to have a Windows 2016 Server Datacenter license. As the original license is a Datacenter evaluation you will need to perform an upgrade (Note: slmgr /ipk and slui won't work). Enter the following command in an elevated prompt:
Dism /online /Set-Edition:ServerDatacenter /AcceptEula /ProductKey:12345-67890-12345-67890-12345
You will have to replace the bogus key above with your own key.
Watch out for the Certificates Expiration Problem.
Eventually four certificates in your VM will expire. You will start getting these messages when trying to open D365 from a browser:
    There is a problem with the server
    Sorry, the server has encountered an error. It is either not available or it can't respond at this time. Please contact your system administrator.
And you will get this when trying to debug from within Visual Studio:
    Unable to proceed with debugging. One or more errors occurred.
    See the exception details below for more information.
    The remote server returned an error: (500) Internal Server Error.
There is a good article by Volker Deuss on how to fix this problem and you can find it here.
We have also created a tool that automates the above process and you can download it from this link. Once you go over the install procedure it will create a shortcut to the application on the desktop, run it and just click on the execute button. It will backup the 3 config files in the "C:\AOSService\webroot\VHDCertExtenderBackup" directory in case anything goes wrong. It has been tested in an update 8, 12 & 15 VM but it hasn't been tested in earlier versions yet. The restart functionality won't work so you'll have to restart the VM manually.